
How to do Budget Gardening With Just $20 and Basic Tools
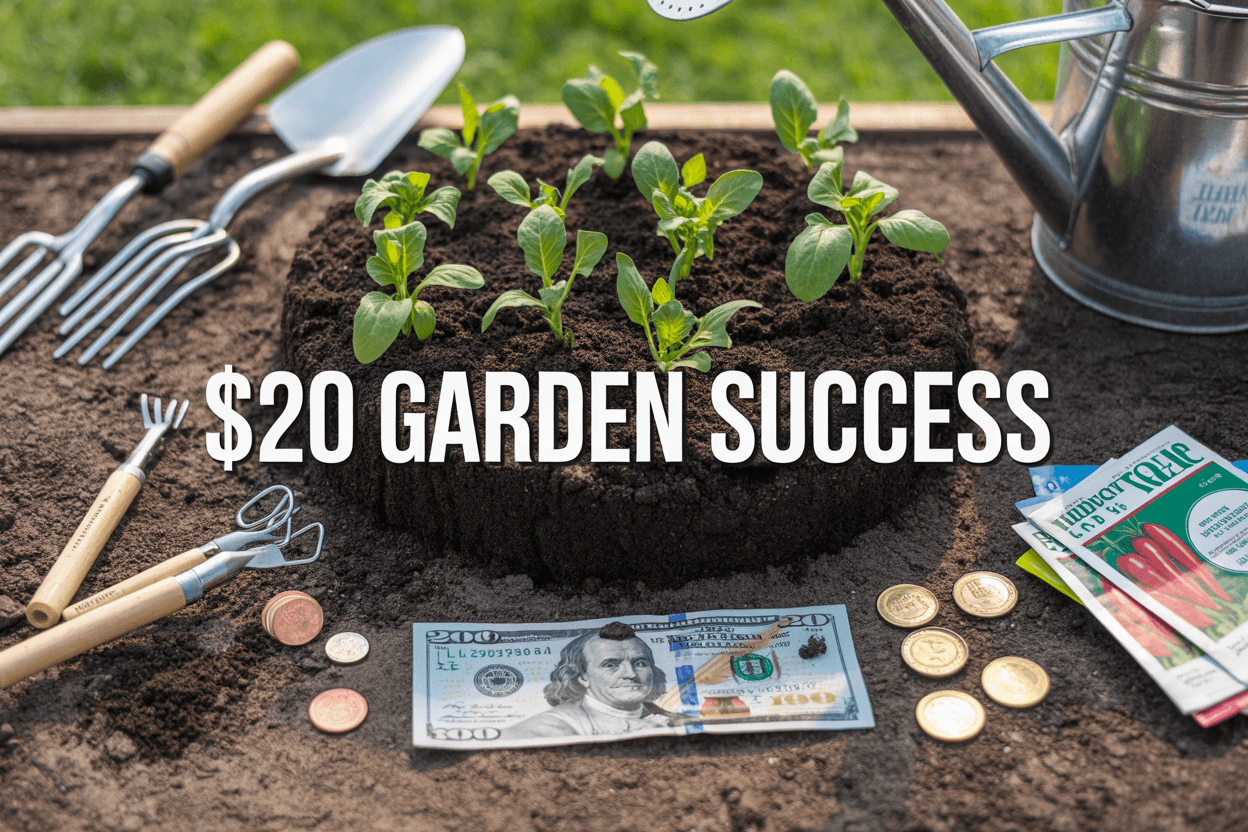
I started my first garden with nothing but a crumpled twenty-dollar bill and a dream of fresh tomatoes. If you’re a beginner gardener on a tight budget or someone who wants to prove that budget gardening doesn’t mean sacrificing results, this guide is for you.
My cheap gardening ideas have helped hundreds of new gardeners create thriving spaces without emptying their wallets. I’ll walk you through the exact planning steps that squeeze maximum impact from minimal investment, plus the smart shopping strategies I use to stretch every dollar.
You’ll also discover which basic tools are actually worth buying versus the ones you can skip, and my favorite methods for preparing soil using free materials you can find in your own backyard. By the end, you’ll have everything you need to start growing your own food and flowers for less than the cost of a dinner out.
Essential Planning for Maximum Garden Impact on Minimal Budget
Assess Your Available Space and Sunlight Conditions
Before I spend my precious $20 on seeds and supplies, I need to get smart about what I’m working with. I start by walking around my space at different times of the day – morning, noon, and late afternoon – to see how the sun moves across my potential garden areas. This simple observation saves me from making expensive mistakes later.
I look for spots that get at least 6-8 hours of direct sunlight. My vegetables will struggle in shade, and I can’t afford to waste money on plants that won’t produce. If I only have partial shade areas, I make note of them for leafy greens like lettuce and spinach that can handle less light.
Space doesn’t have to be huge to be productive. I measure what I have – even a 4×4 foot area can yield surprising amounts of food with smart planning. For apartment dwellers, I check balconies, windowsills, or even indoor spaces near south-facing windows. Container gardening becomes my best friend when ground space is limited.
I also check my soil by digging a small hole. If water pools after rain, I know drainage might be an issue. Rocky soil tells me I might need raised beds or containers. These observations help me decide where my budget goes – toward soil amendments, containers, or different planting strategies.
Choose Fast-Growing, High-Yield Vegetables for Immediate Results
With only $20 to work with, I focus on vegetables that give me the biggest bang for my buck. Radishes top my list because they’re ready in just 30 days and cost pennies per packet. I can plant them between slower-growing crops to maximize space.
Lettuce and spinach become my green gold mines. I can harvest outer leaves while the center keeps growing, giving me continuous harvests for weeks. A $2 packet of seeds feeds me salads for months when I practice succession planting.
Green beans deserve a spot in every budget garden. Bush varieties don’t need trellises, saving money on supports, and they produce heavily in just 50-60 days. Plus, they add nitrogen to the soil, improving it for future crops.
Zucchini and summer squash are legendary producers – sometimes too productive! One plant can feed a family, and seeds cost under $3. I choose compact varieties for small spaces.
Here’s my go-to budget vegetable comparison:
| Vegetable | Days to Harvest | Seed Cost | Yield Potential | Space Needed |
|---|---|---|---|---|
| Radishes | 30 days | $1-2 | High | Very Small |
| Lettuce | 45 days | $2-3 | High | Small |
| Green Beans | 55 days | $2-3 | Very High | Medium |
| Zucchini | 50 days | $3 | Extremely High | Large |
| Spinach | 40 days | $2 | High | Small |
I skip expensive transplants and stick to direct-sown seeds. Tomatoes and peppers, while tempting, eat up too much of my budget as seedlings and take longer to produce.
Create a Seasonal Planting Schedule to Extend Harvest Periods
Smart timing turns my small budget into months of fresh food. I create a simple calendar marking my area’s last frost date in spring and first frost in fall – these dates guide everything I do.
For cheap gardening ideas that maximize my harvest window, I practice succession planting. Instead of planting all my lettuce seeds at once, I plant a new row every two weeks. This gives me fresh salad greens from spring through fall rather than one big harvest that goes to waste.
I plan my spring garden around cool-season crops that can handle light frosts: peas, lettuce, radishes, and spinach go in 2-4 weeks before my last frost date. These budget gardening choices give me early harvests while warm-season plants wait for warmer soil.
My summer schedule focuses on heat-lovers planted after soil warms: beans, zucchini, and cucumbers. I time these plantings so they’re producing during peak growing season.
Fall brings another opportunity for cool-season crops. I plant a second round of lettuce, spinach, and radishes 10-12 weeks before my first frost. These often taste better than spring crops because cool weather concentrates flavors.
I keep a simple notebook tracking what I plant when and how it performs. This year’s notes become next year’s roadmap for even better budget gardening success. Weather varies yearly, but my documented timing helps me adjust and improve.
Winter planning happens even in cold climates. I save seeds from my best plants, plan next year’s garden layout, and research new budget-friendly varieties. This preparation ensures I hit the ground running when spring arrives, making every dollar count toward maximum garden impact.
Smart Shopping Strategies to Maximize Your $20 Investment
Buy seeds instead of seedlings for maximum quantity
When I’m working with just $20, I skip the expensive seedling section and head straight for the seed packets. Seeds give me incredible bang for my buck – one packet that costs $2-3 can produce dozens of plants, while a single seedling might cost the same amount. I’ve learned this is one of the biggest money-saving secrets in budget gardening.
The math is simple: a packet of tomato seeds contains about 20-30 seeds for $2.50, while one tomato seedling costs $3-4. If I start my own seeds, I can grow enough tomatoes for my entire season with just one packet. The same goes for lettuce – one packet gives me multiple sowings throughout the growing season.
I focus on easy-to-start seeds like radishes, beans, lettuce, and herbs. These germinate quickly and don’t need special equipment. For beginners worried about seed starting, I recommend starting with these foolproof options that practically grow themselves.
Focus on multi-harvest vegetables that keep producing
My cheap gardening ideas always center around plants that give multiple harvests. Cut-and-come-again crops are my best friends because they keep producing for months from a single planting. I prioritize lettuce, spinach, kale, and Swiss chard – I can harvest outer leaves while the center keeps growing.
Bush beans are another winner. They produce for weeks, and I can succession plant every two weeks for continuous harvests. Herbs like basil, parsley, and cilantro multiply my investment since I can keep cutting them all season long.
Tomatoes, though they require more patience, give enormous yields. One plant can produce 10-15 pounds of fruit over the growing season. I always include at least two tomato plants in my budget because the return on investment is massive.
I avoid single-harvest crops like corn or cabbage when I’m budget gardening. While they’re great vegetables, they don’t stretch my dollars like continuous producers do.
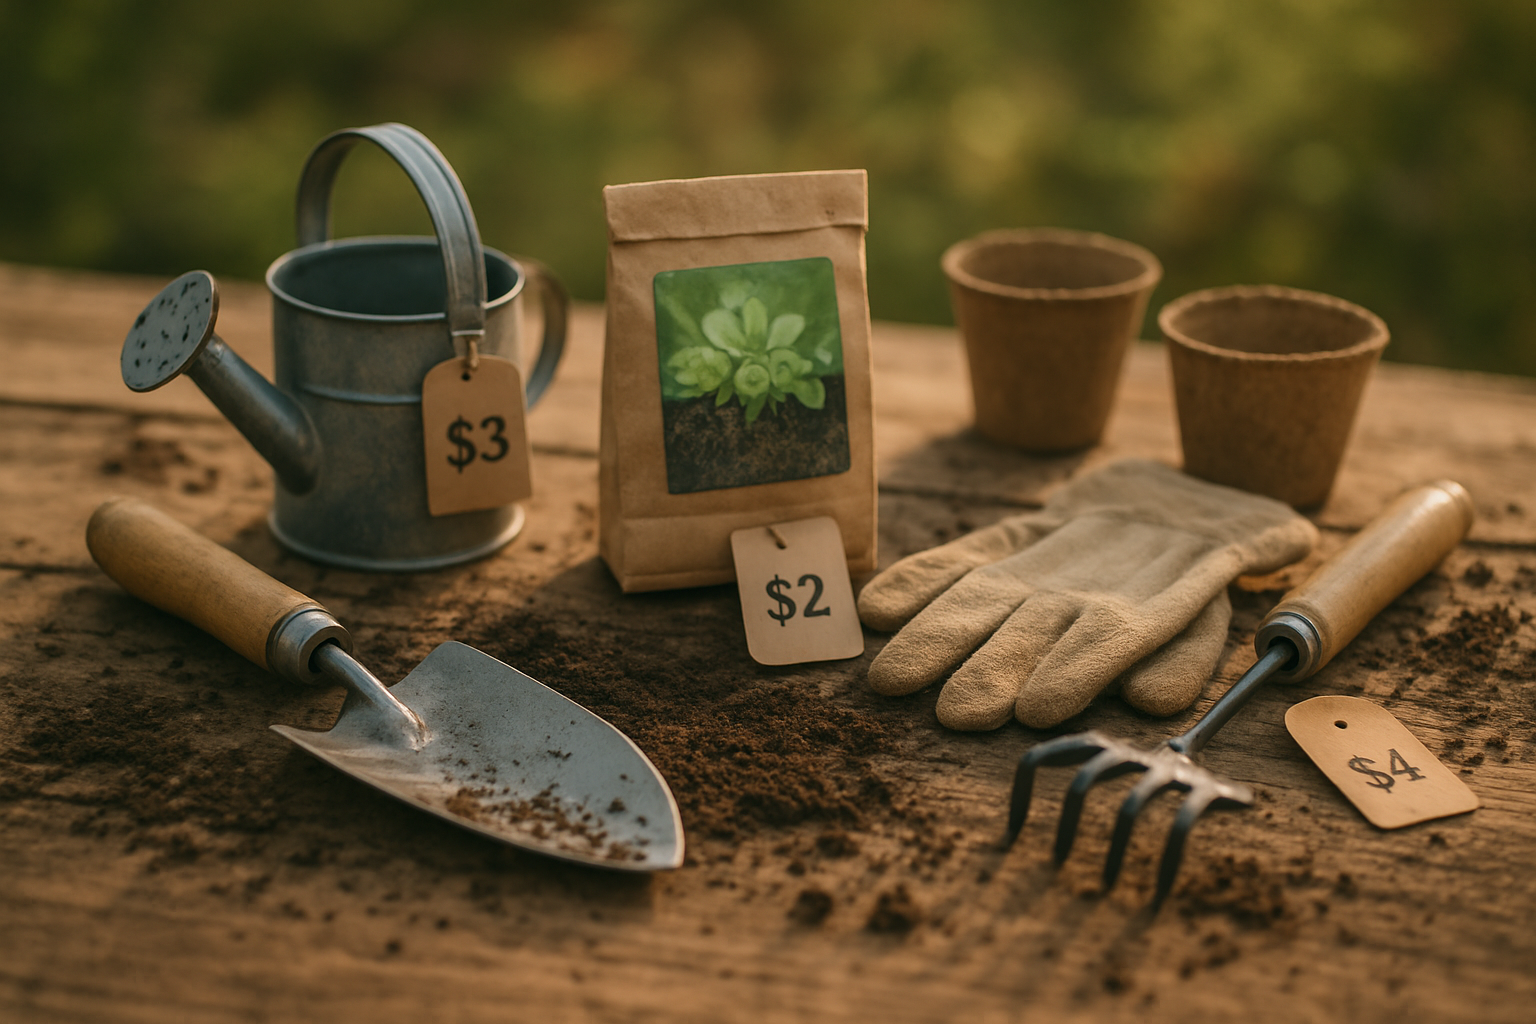
Shop end-of-season sales for discounted supplies
Timing my shopping trips saves me serious money. I hit garden centers in late summer and fall when they’re clearing inventory. I’ve scored quality hand tools for 50-70% off their original price during these sales.
Seeds go on clearance too, especially in late summer. While I might be planning for next year’s garden, getting seeds for 25 cents instead of $3 is worth the wait. I store them properly in a cool, dry place, and most remain viable for several years.
End-of-season also brings deals on basic supplies like small hand tools, watering cans, and plant stakes. I stock up on these essentials when prices drop, building my gardening toolkit gradually without breaking my budget.
Compare prices between garden centers and dollar stores
I’ve discovered that dollar stores carry surprisingly useful gardening supplies. Basic hand tools, spray bottles, and small containers work just as well as expensive versions. A $1 spray bottle waters seedlings perfectly, while the garden center version costs $8.
For seeds, I compare prices everywhere – dollar stores, grocery stores, hardware stores, and garden centers. I’ve found quality seeds at unexpected places for fraction of typical prices.
However, I’m selective about what I buy cheaply. Hand tools from dollar stores work fine for light tasks, but I invest in quality items for heavy-duty work. The key is knowing where to save and where to spend within my budget gardening approach.
Basic Tools You Need Without Breaking the Bank
Repurpose household items as effective garden tools
I’ve discovered that some of the best gardening tools are already sitting in my kitchen drawers and storage closets. When I first started my budget gardening journey, I was amazed at how creative I could get with everyday items.
My old kitchen spoons became my favorite transplanting tools. The curved shape makes them perfect for scooping seedlings from starter containers without damaging delicate roots. I keep several sizes on hand – teaspoons for tiny seedlings and tablespoons for larger plants. Even when the handles get loose or the finish wears off, they’re still garden-worthy.
Empty yogurt containers and plastic takeout containers have transformed my seed-starting game. I poke drainage holes in the bottom with a hot nail, and they work just as well as expensive seed trays. The clear lids create mini greenhouses that help seeds germinate faster. I’ve started hundreds of plants this way without spending a dime on specialized equipment.
My kitchen colander doubles as an excellent harvesting basket. The holes allow dirt to fall through, and it’s easy to rinse vegetables right in the sink. Old kitchen towels become plant ties – I tear them into strips and use them to support tomato plants and other climbers. Unlike twist ties or plastic, they’re gentle on stems and expand as plants grow.
Bathroom items work wonders too. Empty shampoo bottles with holes poked in the caps make perfect watering devices for seedlings. The gentle spray doesn’t disturb tiny plants like a full-force hose would. Old toothbrushes are incredible for cleaning vegetables and removing aphids from plant leaves.
I’ve turned broken ceramic plates into plant saucers and cracked mugs into small planters for herbs. Even damaged items find new life in my garden setup. The key is looking at everything with fresh eyes – that broken spatula becomes a soil mixer, and those worn-out socks become protective covers for young plants during cold snaps.
Invest in one quality hand tool for multiple functions
After years of cheap gardening ideas and budget gardening experiments, I’ve learned that buying one excellent multi-purpose tool beats collecting a drawer full of flimsy gadgets. My game-changer was investing in a high-quality hori hori knife.
This single tool replaced about six different implements I was struggling with. The serrated edge cuts through roots and tough weeds, the straight edge works for transplanting and measuring planting depth, and the pointed tip loosens soil and creates planting holes. I use mine for digging, weeding, cutting, measuring, and even opening stubborn seed packets.
What makes this investment smart is durability. I spent $25 on mine three years ago, and it still looks nearly new. Compare that to the $3 hand tools I used to buy that bent or broke within months. The math works out beautifully when you factor in replacement costs.
A quality hand pruner runs a close second for versatility. I can harvest vegetables, deadhead flowers, prune small branches, and even cut twine and plant ties. The clean cuts heal faster than tears from dull tools, which means healthier plants and better yields.
When shopping for that one perfect tool, I look for full tang construction (where the metal extends through the entire handle) and comfortable grips. Stainless steel resists rust and stays sharper longer. Many quality tools come with lifetime warranties, making them even better investments.
The beauty of focusing on one excellent tool is that you become really skilled with it. I know exactly how my hori hori feels in different soil conditions, and I can work much faster than when I was constantly switching between multiple inferior tools.
Create your own plant markers and labels for free
Keeping track of what I’ve planted where used to be a constant struggle until I discovered how easy it is to make my own labels from materials I already had around the house.
Plastic containers provide endless labeling opportunities. I cut yogurt containers, takeout containers, and milk jugs into strips about 4 inches long and 1 inch wide. The white plastic takes permanent marker beautifully, and the labels last the entire growing season. I’ve found that cutting them with a slight point on one end makes them easier to push into soil.
Old venetian blinds became my premium label source. The slats are already the perfect width, weather-resistant, and I can write on them with pencil (which never fades) or permanent marker. One set of discarded blinds gave me enough labels for three full seasons.
Popsicle sticks from my kids’ craft supplies work great for temporary labeling, though they don’t last as long outdoors. I write on them with pencil since ink tends to run in the rain. For a more permanent solution, I coat them with clear nail polish after writing.
My most creative discovery was using smooth rocks as labels. I write directly on them with permanent marker or paint pen. They’re completely weatherproof, reusable, and actually look attractive in the garden beds. Plus, they’re heavy enough that wind can’t blow them away.
For row labeling, I save the seed packets themselves and slip them into small plastic bags, then staple or tape them to wooden stakes made from paint stirrers (free at most hardware stores). The original packet shows variety information, planting dates, and expected harvest times.
Emergency labels come from masking tape wrapped around small sticks. While not long-lasting, they’re perfect for quick identification during planting sessions. I always keep a roll in my garden supplies for this purpose.
Soil Preparation Techniques Using Free and Cheap Materials
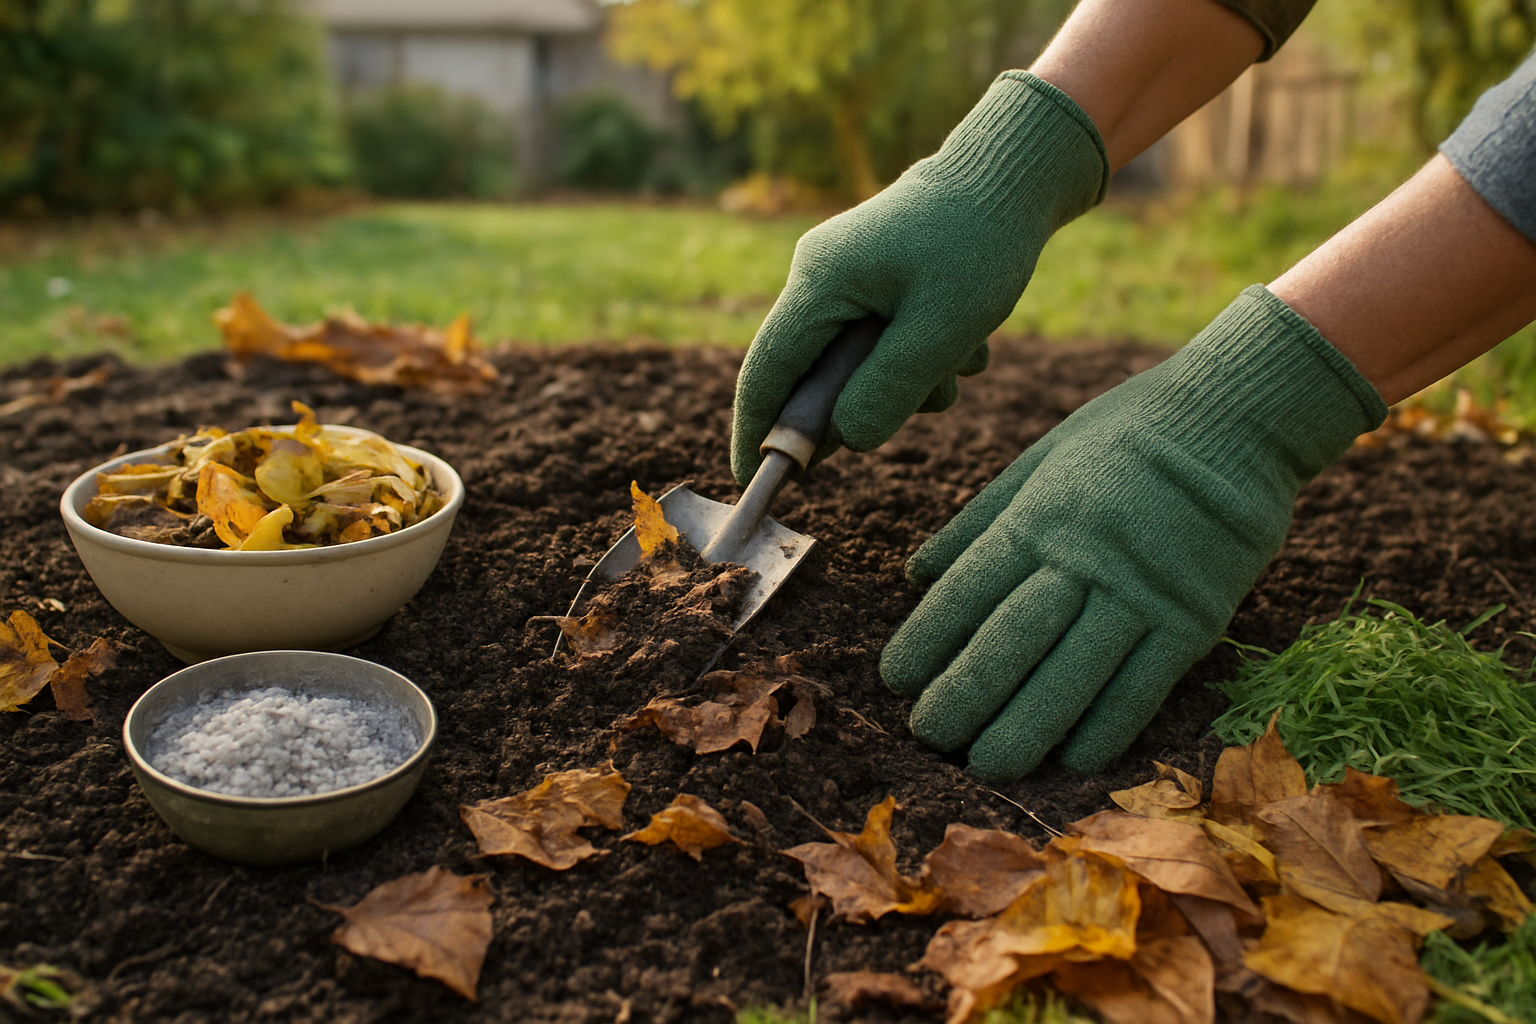
Build nutrient-rich compost from kitchen scraps
I started my first compost bin with nothing more than a plastic storage container and some kitchen scraps. Within three months, I had rich, dark compost that transformed my garden soil completely. The best part? It cost me absolutely nothing beyond what I was already throwing away.
My composting system begins in the kitchen with a small container where I collect vegetable peels, coffee grounds, eggshells, and fruit scraps. I avoid meat, dairy, and oils since they attract pests and slow decomposition. Every few days, I layer these scraps in my outdoor bin with “brown” materials like dried leaves, shredded newspaper, or cardboard.
The key to fast, effective composting is maintaining the right balance. I use roughly three parts brown materials to one part green materials. When I turn the pile weekly with a shovel, I can practically watch it transform. During peak growing season, I get finished compost in just six to eight weeks.
For budget gardening enthusiasts, this approach saves money on expensive soil amendments while reducing household waste. My kitchen scraps alone provide enough compost material for several raised beds throughout the growing season.
Source free organic matter from local sources
I’ve discovered incredible sources of free organic matter right in my community. Coffee shops throw away hundreds of pounds of used coffee grounds weekly – I simply ask the manager and bring my own containers. These grounds are slightly acidic and perfect for plants like tomatoes and blueberries.
Local tree services often dump wood chips and leaves at municipal sites. I load up my car with aged wood chips, which make excellent mulch and eventually break down into soil amendments. Many neighbors bag their fall leaves for city pickup, but I knock on doors and ask if I can take them instead.
Horse stables and small farms frequently give away aged manure. I’ve built relationships with three local horse owners who call me when they clean stalls. This well-aged manure is garden gold, providing both nutrients and organic matter that improves soil structure.
| Source | Material | Best Use | Availability |
|---|---|---|---|
| Coffee shops | Used grounds | Acid-loving plants | Year-round |
| Tree services | Wood chips | Mulch, soil amendment | Spring/Fall |
| Neighbors | Bagged leaves | Compost, mulch | Fall |
| Stables | Aged manure | General soil amendment | Year-round |
Test and improve soil pH using household items
I learned to test soil pH using simple household items before spending money on expensive kits. My go-to method involves collecting soil samples from different garden areas and testing them with white vinegar and baking soda.
For the vinegar test, I place a tablespoon of soil in a bowl and add white vinegar. If it fizzes, my soil is alkaline (above 7 pH). For the baking soda test, I mix soil with distilled water to create a paste, then add baking soda. Fizzing indicates acidic soil (below 7 pH). No reaction in either test suggests neutral pH around 7.
When I need to lower pH for acid-loving plants, I work used coffee grounds directly into the soil or create a mild coffee solution for watering. Pine needles collected from local parks also acidify soil naturally as they decompose.
To raise pH in acidic soil, I crush clean eggshells and work them into planting areas. Wood ash from my fireplace provides another free pH-raising option, though I use it sparingly since it’s very concentrated.
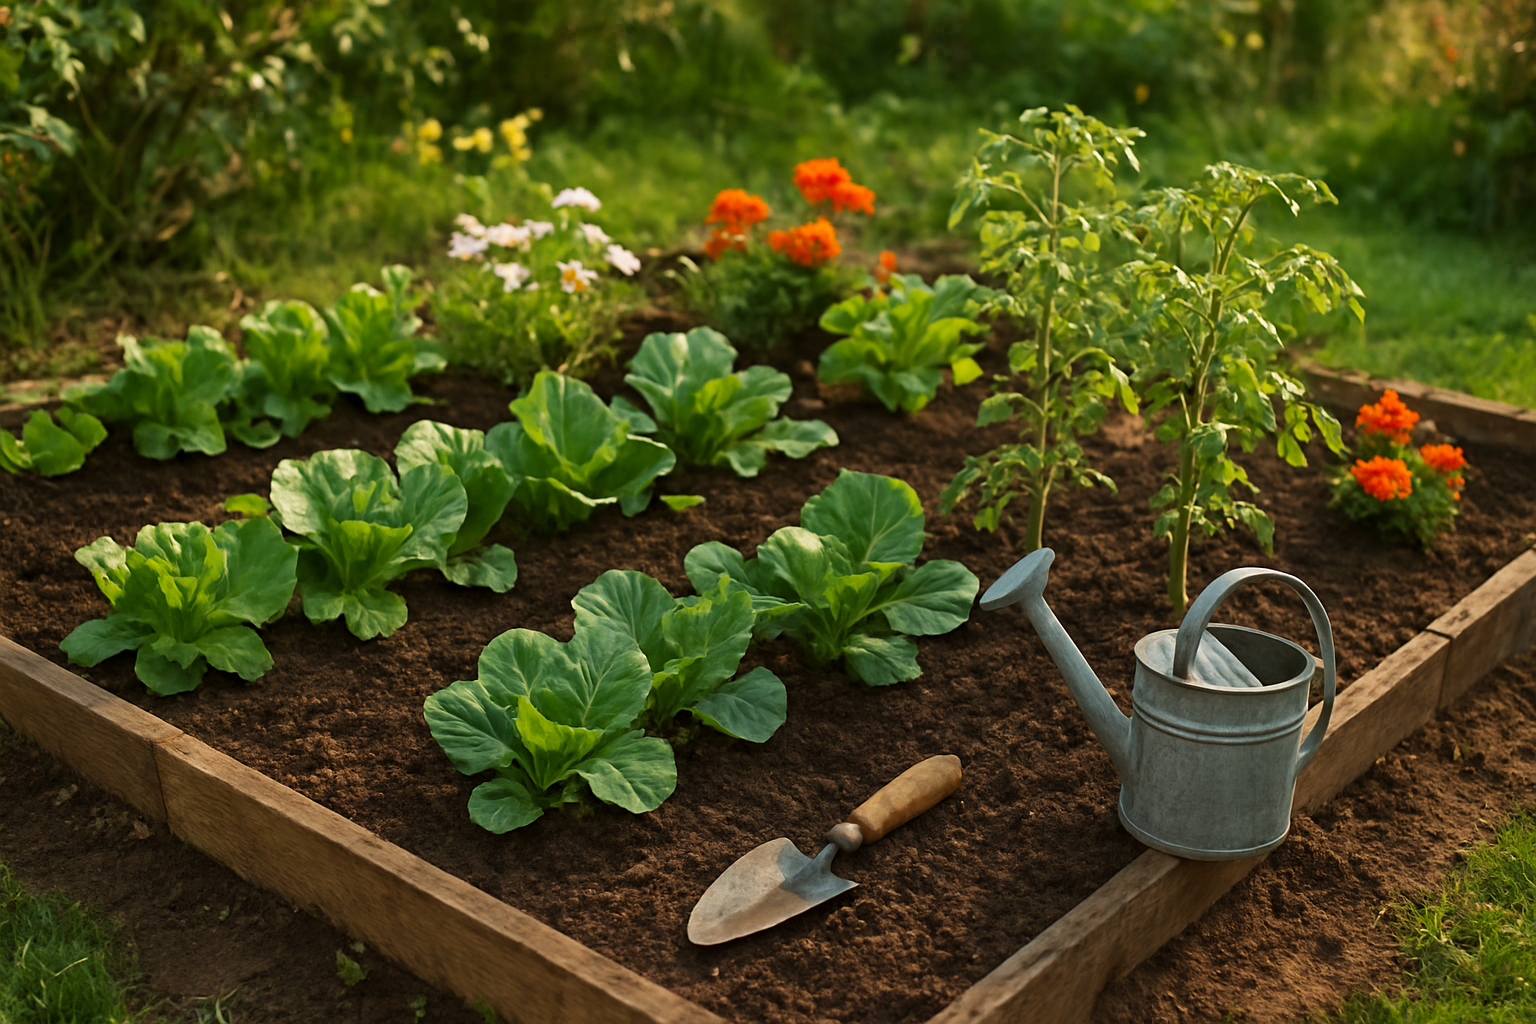
Create raised beds using recycled materials
My first raised beds cost me under $15 total because I used recycled and repurposed materials. I built frames from old pallets that a local business was discarding. After checking that they weren’t treated with harmful chemicals (I avoid pallets marked with “MB” for methyl bromide), I disassembled them and rebuilt the boards into rectangular frames.
Concrete blocks from construction sites make excellent raised bed walls. I stack them two high without mortar, filling the hollow cores with soil for additional planting space. These blocks often cost nothing when contractors need them hauled away.
For smaller beds, I repurpose old dresser drawers, wooden crates, or even large plastic storage containers with drainage holes drilled in the bottom. I’ve created beautiful raised beds from discarded fence panels and old wooden shipping pallets.
The key to successful cheap gardening ideas is thinking creatively about materials others might discard. My raised bed gardens now produce more vegetables than I can eat, all built from materials that would have otherwise ended up in landfills. Each bed pays for itself within one growing season through the vegetables it produces.
Seed Starting and Planting Methods That Guarantee Success
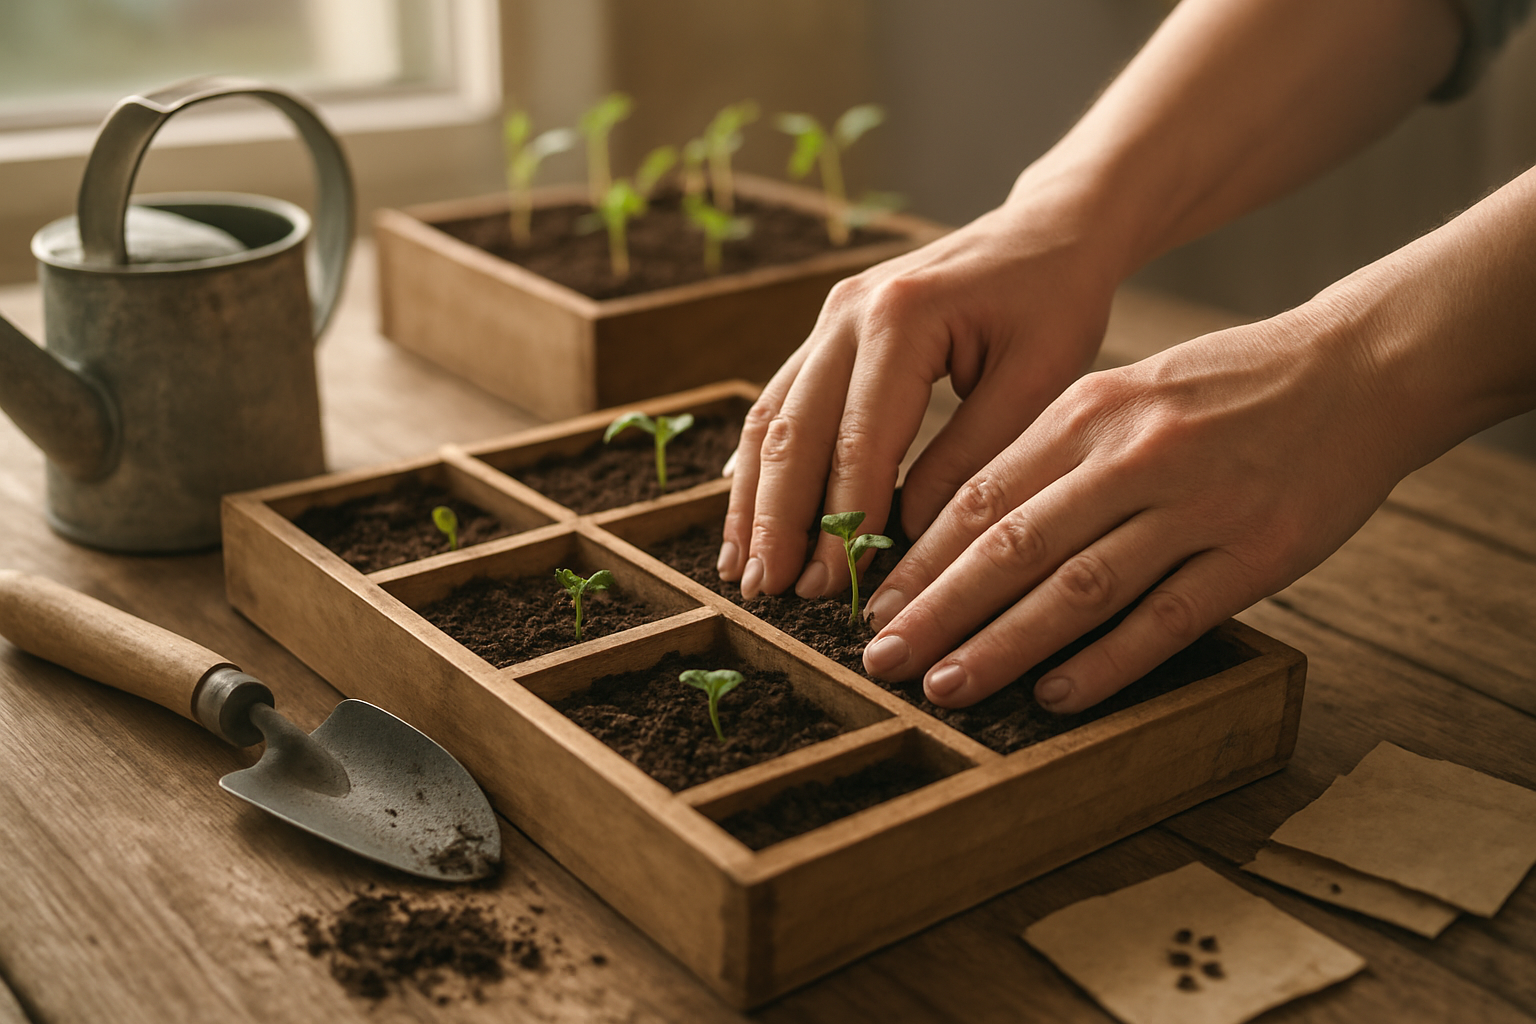
Start seeds indoors using recycled containers
I’ve discovered that starting seeds indoors dramatically improves my success rate while keeping costs minimal. Instead of buying expensive seed trays, I repurpose containers from my kitchen – yogurt cups, egg cartons, takeout containers, and even toilet paper rolls work perfectly.
My favorite budget gardening approach involves collecting plastic containers throughout winter. I drill drainage holes in the bottom using a heated nail or small screwdriver. For larger seeds like beans or squash, I use yogurt containers. Smaller seeds like lettuce or herbs go into egg carton compartments, which I can plant directly into the ground since they’re biodegradable.
I create my own seed starting mix by combining garden soil with compost (often free from local sources) and sand for drainage. This costs me practically nothing compared to commercial seed starting mixes. I label each container with masking tape and a permanent marker – simple but effective.
Starting seeds indoors gives me a 4-6 week head start on the growing season. I place my containers near a sunny window or under a basic desk lamp with an LED bulb. The warmth and controlled environment means better germination rates, which translates to more plants for my money.
Practice succession planting for continuous harvests
Succession planting has revolutionized my cheap gardening ideas and maximized my $20 investment. Instead of planting all my lettuce seeds at once, I plant a new row every two weeks throughout the season. This means I’m harvesting fresh greens continuously rather than dealing with a huge harvest that goes bad.
I apply this method to fast-growing crops like radishes, spinach, green beans, and herbs. My planning calendar shows when to plant the next round – I set phone reminders so I don’t forget. This approach means I’m never overwhelmed with too much produce at once, and I avoid the feast-or-famine cycle that many new gardeners experience.
For my budget garden, succession planting also means I can buy smaller seed packets since I’m not planting everything immediately. I can stretch one packet of lettuce seeds across three months of planting, getting much more value from each purchase.
Use companion planting to maximize space efficiency
Companion planting has become my secret weapon for getting the most out of limited space and money. I plant fast-growing radishes between my slower-growing tomatoes. The radishes are harvested before the tomatoes need the space, essentially giving me two crops in one area.
My favorite combinations include planting lettuce in the shade of taller plants like beans or tomatoes. The lettuce stays cooler and doesn’t bolt as quickly in summer heat. I also grow herbs like basil near my tomatoes – they supposedly improve flavor while using minimal additional space.
Vertical growing saves me money and space. I plant pole beans or peas that climb existing fences or simple stakes I’ve hammered into the ground. Underneath, I grow shade-tolerant plants like lettuce or spinach. This layered approach means I’m growing three times as much food in the same footprint.
Apply proper spacing techniques to prevent overcrowding
Learning proper spacing has saved me from wasting seeds and money on plants that compete with each other. I measure spacing using my hand – most small plants need about a hand’s width apart, larger plants need more. This simple method works without needing rulers or complicated measurements.
I thin seedlings ruthlessly, even though it feels wasteful initially. Overcrowded plants produce less food and are more susceptible to disease. The thinned seedlings often make great salad greens, so nothing actually goes to waste. I’ve learned that fewer, well-spaced plants always outproduce many crowded ones.
My spacing strategy includes interplanting quick-growing crops between slower ones. I plant spinach between my pepper plants early in the season. The spinach is harvested before the peppers need full space, maximizing my garden’s productivity without additional cost.
Low-Cost Maintenance Strategies for Thriving Plants
Create natural pest control solutions from common ingredients
I’ve discovered that keeping pests away doesn’t require expensive chemical sprays. My go-to recipe uses ingredients I already have in my kitchen. I mix one tablespoon of liquid dish soap with one quart of water to create an effective aphid spray. This solution costs pennies and works just as well as store-bought alternatives.
For stubborn pests like spider mites, I crush three garlic cloves and steep them in two cups of hot water overnight. After straining, I add a few drops of dish soap and spray directly on affected plants. The smell might be strong, but it keeps unwanted insects at bay without harming my budget gardening efforts.
Diatomaceous earth works wonders against crawling insects. I sprinkle this powder around the base of my plants to create a barrier that slugs and ants won’t cross. A small bag costs under $5 and lasts months, making it perfect for cheap gardening ideas.
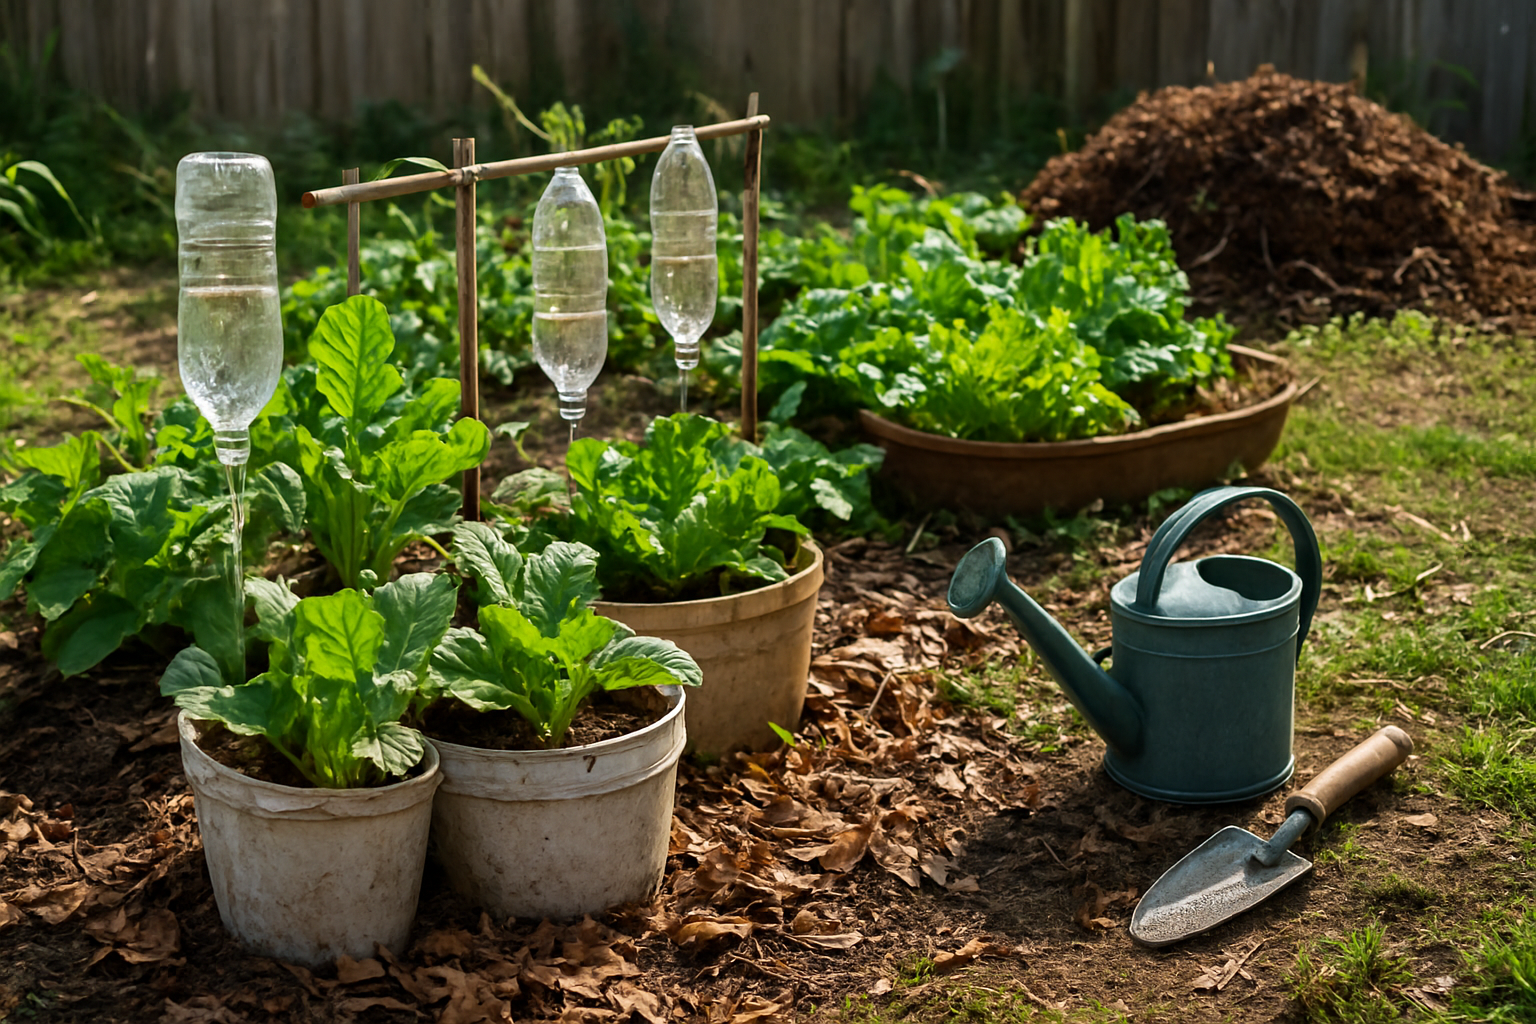
Set up efficient watering systems using recycled bottles
I’ve turned plastic bottles into my own drip irrigation system. I poke small holes in the bottom of 2-liter soda bottles and bury them halfway next to thirsty plants like tomatoes. When I fill these bottles with water, they slowly release moisture directly to the roots over several days.
For seedlings, I cut the bottom off water bottles and flip them upside down, creating mini greenhouses that retain moisture. This method reduces my watering frequency by half and gives me consistent results with delicate plants.
My most clever watering hack involves old milk jugs. I cut small notches around the rim and place them over newly planted seeds. The jugs collect morning dew and rainwater while protecting seedlings from harsh weather. This system practically waters itself.
Make organic fertilizer from kitchen waste
Coffee grounds have become my secret weapon for acid-loving plants. I collect used grounds from my morning brew and mix them directly into the soil around blueberries and tomatoes. The nitrogen boost costs me nothing and reduces my kitchen waste.
Banana peels provide potassium that helps plants develop strong roots and better fruit production. I chop them up and bury the pieces around my vegetable plants. Within weeks, I notice improved plant vigor and healthier foliage.
My compost tea recipe involves soaking vegetable scraps in water for a week. I strain the liquid and dilute it with equal parts water before feeding my plants. This nutrient-rich fertilizer costs absolutely nothing and performs better than many commercial options.
Eggshells crushed into powder add calcium to prevent blossom end rot in tomatoes and peppers. I save shells throughout the week, crush them with a rolling pin, and sprinkle the powder around susceptible plants.
Implement mulching techniques using free materials
Fallen leaves make excellent mulch that I collect from my neighborhood each autumn. I rake them around my garden beds to suppress weeds and retain soil moisture. This free mulching material breaks down slowly, enriching my soil as it decomposes.
Grass clippings from mowing create a nitrogen-rich mulch layer. I spread thin layers around my plants, being careful not to pile too thick, which could create anaerobic conditions. Fresh clippings work best when mixed with dried materials.
Shredded newspaper serves as an effective weed barrier under other mulch materials. I lay sections around plants and cover with leaves or straw. The paper eventually decomposes while keeping weeds from establishing.
Cardboard boxes flattened and placed between rows eliminate weeds completely. I cover the cardboard with organic matter for aesthetics, but the barrier underneath prevents any unwanted growth while slowly breaking down to improve soil structure.
Conclusion
Starting a garden for just $20 isn’t just possible, it’s actually pretty straightforward when you know where to focus your efforts. I’ve shown you how smart planning, strategic shopping, and making the most of free resources like compost materials can stretch every dollar. With basic tools from discount stores, creative soil preparation using what’s already around you, and proven seed-starting techniques, you can create a thriving garden that produces fresh food and beautiful plants without emptying your wallet.
The best part about budget gardening is that it teaches you to be resourceful and creative, skills that will serve you well as your garden grows. My advice? Start small, focus on easy-to-grow plants that give you the biggest return on investment, and remember that every experienced gardener started exactly where you are now. Grab your $20, pick up those basic tools, and get your hands dirty, your future self will thank you for taking that first step toward homegrown goodness.