
Composting 101: Turn Kitchen Scraps into Garden Gold
Last updated on January 11th, 2026 at 07:51 am
You just tossed that banana peel in the trash, didn’t you? The average American household throws away nearly 32% of the food they buy—that’s literally money in your garbage can.
But what if those scraps could become your home garden’s secret weapon? Composting isn’t just for environmental warriors with acres of land. It’s for anyone who eats food and has enough space for a shoebox.
This complete guide to composting 101 will show you how to transform yesterday’s coffee grounds and eggshells into tomorrow’s thriving tomato plants. No chemistry degree required.
Ready to turn your kitchen waste into black gold that makes plants practically dance? There’s a method to this magical decomposition—and it’s simpler than you think.
Understanding Composting Basics
What is composting and why it matters for your garden
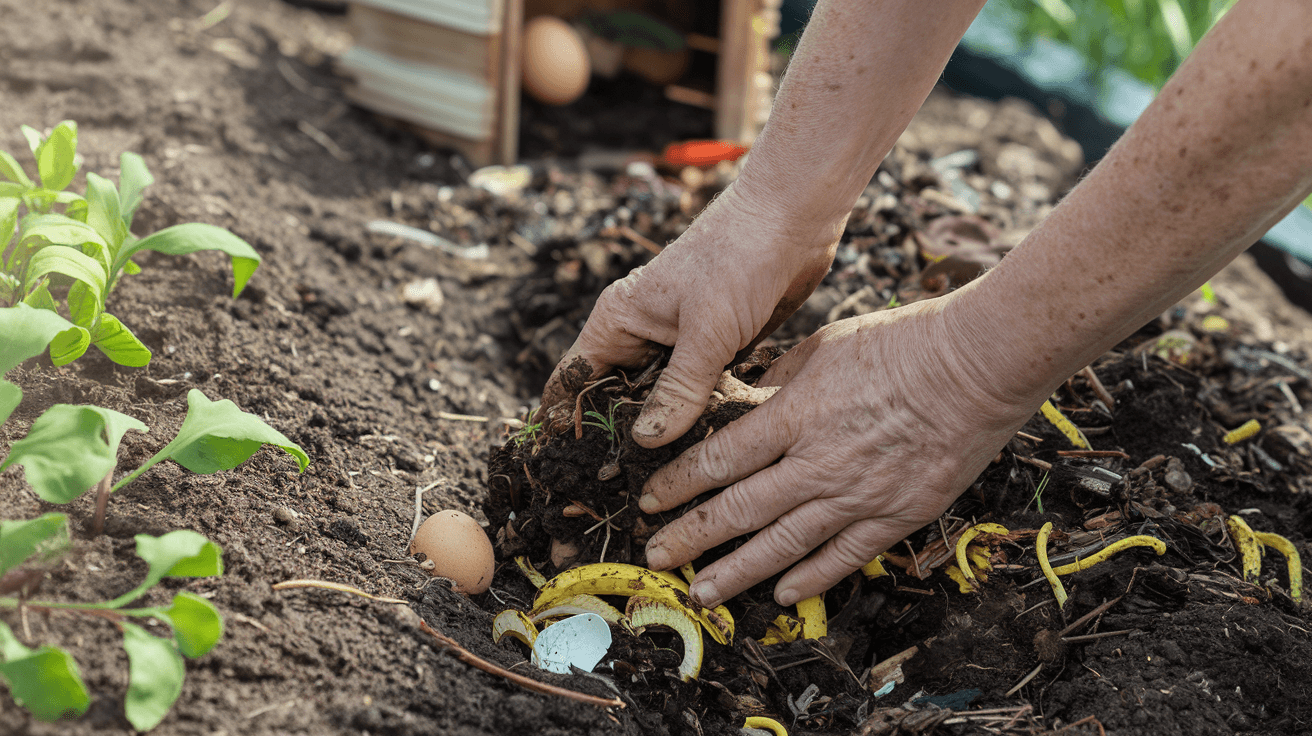
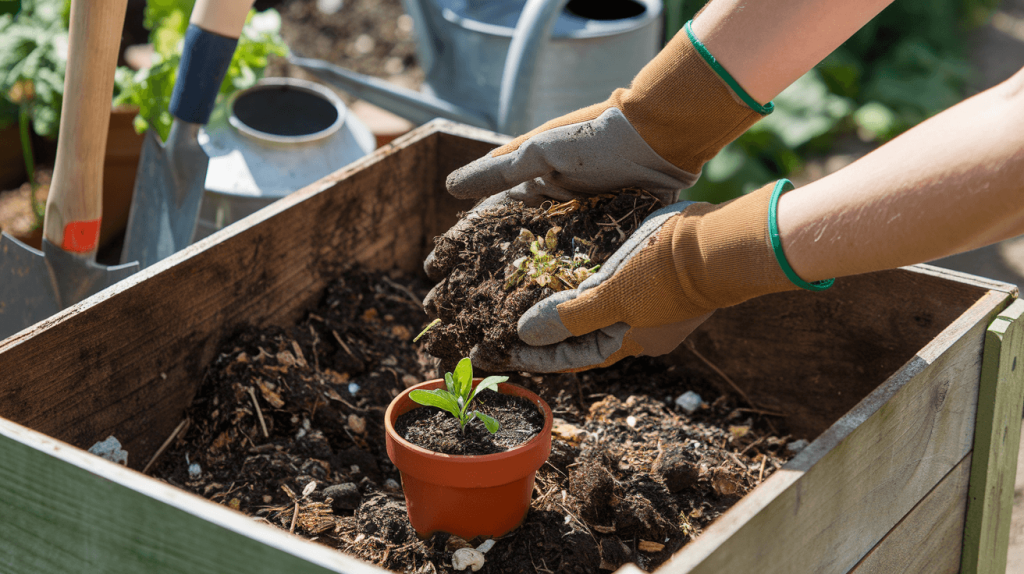
Ever tossed banana peels, coffee grounds, or wilted lettuce in the trash and thought, “There’s got to be a better way”? That’s where composting comes in.
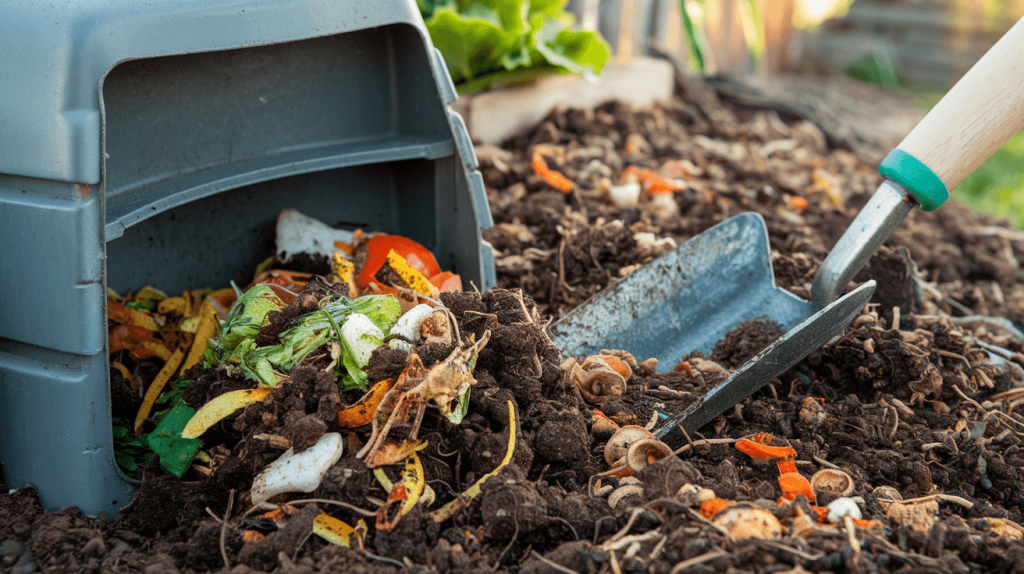
Composting is basically nature’s recycling program. You take kitchen scraps, yard waste, and other organic materials, pile them up, and let them break down into what gardeners call “black gold” – a dark, crumbly soil amendment that plants absolutely love.
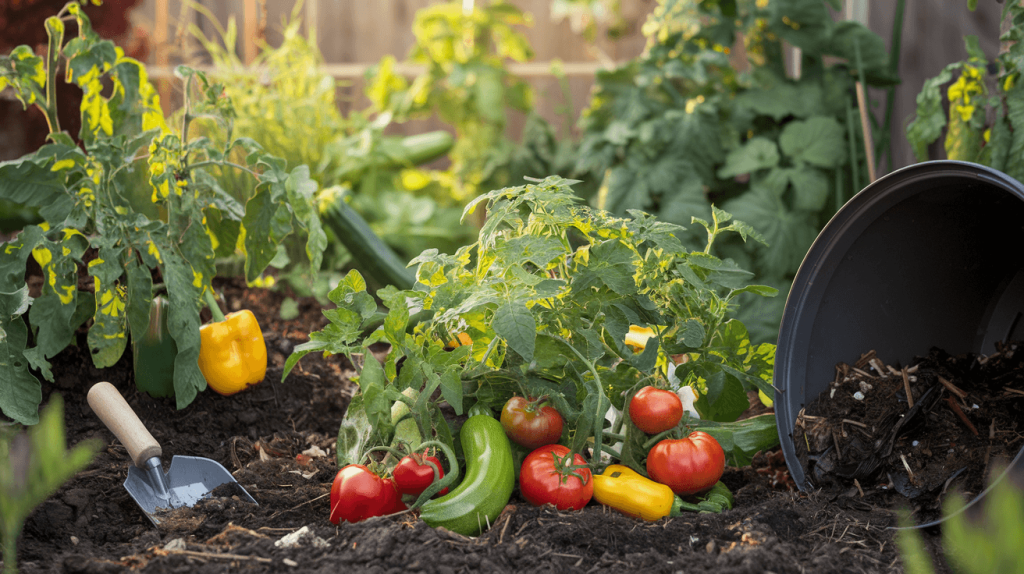
Why does your garden care? Because compost is like a superfood smoothie for your soil. It adds essential nutrients that chemical fertilizers can’t match. It improves soil structure, helping sandy soils hold water better and clay soils drain properly. Your plants will grow stronger, produce more, and fight off pests and diseases like they’ve been hitting the gym.
The science behind turning waste into rich soil
The magic of composting isn’t actually magic at all – it’s biology and chemistry at work.
Your compost pile is home to billions of microorganisms – bacteria, fungi, and other tiny decomposers that break down organic matter. These microscopic workers need four things to thrive:
- Carbon (brown materials like leaves and paper)
- Nitrogen (green materials like food scraps and grass clippings)
- Oxygen (from turning the pile)
- Water (keeping things moist but not soggy)
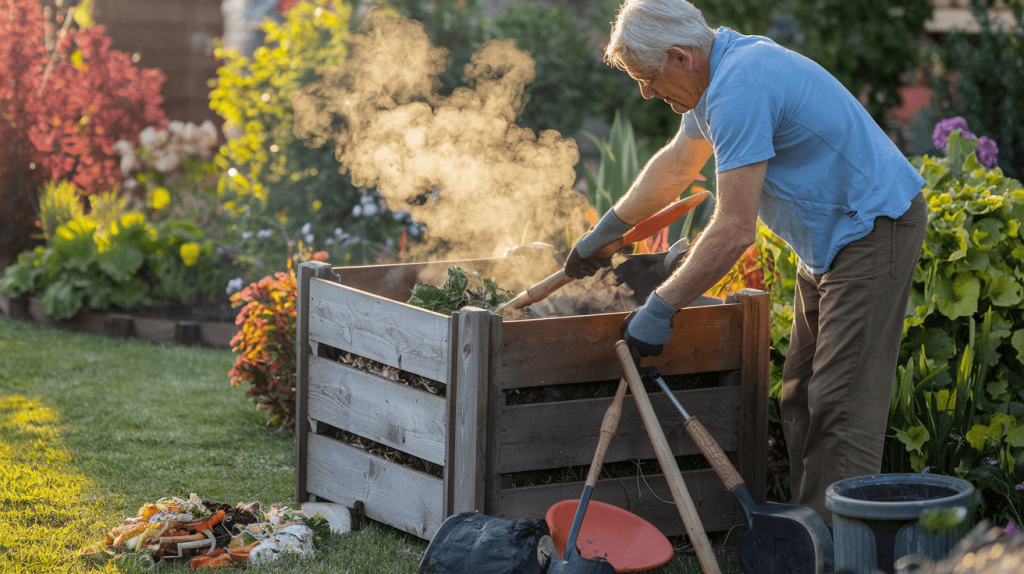
When these elements are in balance, the microbes generate heat as they feed and reproduce. That’s why a working compost pile gets warm – sometimes reaching 140-160°F in the center! This heat speeds decomposition and kills weed seeds and pathogens.
Environmental benefits beyond your garden
Composting isn’t just about growing better tomatoes – it’s a small but mighty environmental action.
When food scraps end up in landfills, they get buried under mountains of trash where they decompose without oxygen. This creates methane – a greenhouse gas 25 times more potent than carbon dioxide. By composting, you’re directly cutting those emissions.
You’re also reducing garbage volume, which means fewer trash trucks on the road and less space needed for landfills. One household’s compost efforts might seem small, but multiply that by millions and we’re talking serious impact.
Plus, healthy soil from compost acts as a carbon sink, pulling CO2 from the atmosphere and storing it in the ground where it belongs.
Economic advantages of making your own compost
Your wallet will thank you for composting, too.
Store-bought compost and fertilizers aren’t cheap. A decent bag of quality compost can run $5-10, and you might need several for even a modest garden. When you make your own, you’re creating this valuable resource from stuff you would’ve thrown away. That’s turning trash into treasure in the most literal sense.
You’ll also save on your garbage bill if your community charges by volume or weight. Many municipalities now offer discounts to households that compost because it reduces their collection and disposal costs.
And the long-term savings? Healthier plants mean less money spent on replacing failed crops, buying pest controls, or irrigating. Compost-rich soil holds moisture better, potentially cutting your water bill during dry spells.
Setting Up Your Composting System

Choosing the right composting method for your space
Ever stared at your kitchen scraps and thought, “I should really start composting…” but then felt overwhelmed by options? Been there.
The truth is, there’s no one-size-fits-all approach to composting. Your perfect method depends on your living situation, available space, and how much effort you’re willing to put in.
Here’s what works where:
| Method | Space Needed | Time Investment | Best For |
|---|---|---|---|
| Traditional Pile | 3×3 feet minimum | Low-medium | Homeowners with yard space |
| Tumbler | 2×2 feet | Low | People who want quicker compost |
| Worm Bin | As small as 1×2 feet | Medium | Small spaces, apartment dwellers |
| Bokashi | Counter-sized bucket | Medium | Indoor composting, apartments |
| Trench Composting | Garden bed space | Very low | Gardeners who want to skip the bin entirely |
City folks with tiny balconies? A compact worm bin might be your jam. Got a sprawling backyard? A traditional pile gives you room to grow.
Essential tools and containers for successful composting
Starting a compost pile doesn’t require fancy equipment, but a few key tools make the process smoother.
Must-haves for any composter:
- Compost bin or container: Whether store-bought or DIY
- Garden fork or compost aerator: For turning and mixing your pile
- Pruning shears: To cut larger scraps into smaller pieces
- Watering can: To maintain moisture levels
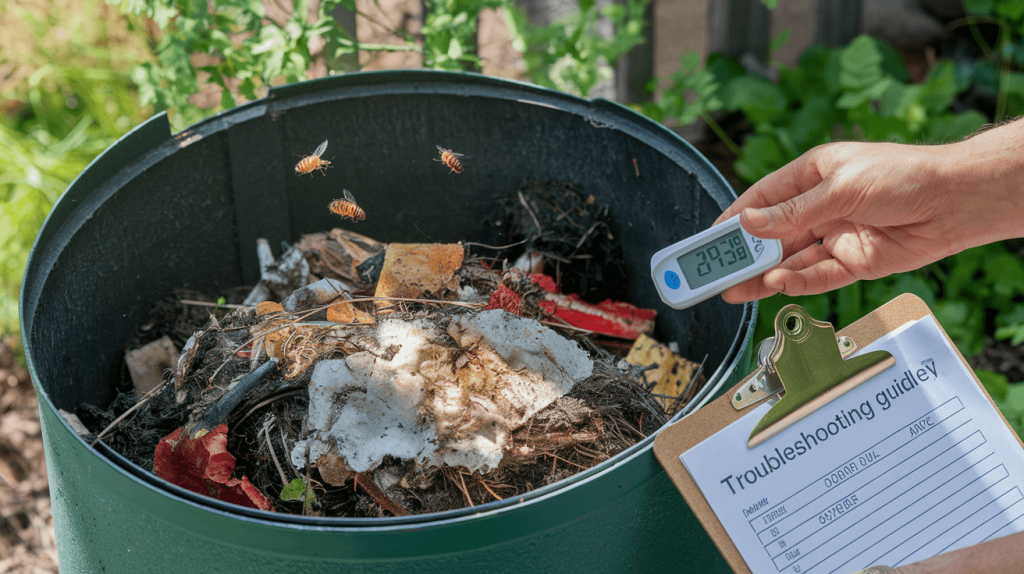
- Thermometer: Optional but helpful for monitoring hot composting
For container options, plastic bins trap heat and moisture well but can crack over time. Wooden bins look natural but eventually rot (which isn’t necessarily bad). Wire bins offer excellent airflow but dry out faster and allow critters easier access.
And don’t sleep on the kitchen collector! A countertop container with a tight-fitting lid makes collecting daily scraps convenient and (crucially) odor-free.
Finding the perfect location for your compost pile
Location can make or break your composting success. The sweet spot balances convenience with practical considerations.
The ideal compost location should be:
- Easily accessible from your kitchen (you won’t trek across the yard in February)
- Partially shaded to prevent drying out
- On bare soil, not concrete, to allow worms and microbes to enter
- Away from wooden structures (to prevent rot)
- At least 2 feet from fences or walls
- Not directly under trees (roots will invade)
Many composters place their bins near the garden for easy transfer when the compost is ready. Just don’t put it somewhere that’ll annoy your neighbors – while a well-maintained pile shouldn’t smell bad, it’s still considerate.
In colder climates, a sunny spot helps maintain decomposition during winter. In hot regions, shade prevents the pile from drying out too quickly.
Indoor composting options for apartment dwellers
No yard? No problem. Apartment composting has come a long way.
Vermicomposting (worm composting) reigns supreme for indoor spaces. Red wiggler worms process food scraps remarkably efficiently in bins that can fit under your sink. These specialized worms don’t escape like earthworms would, and they work quickly when kept at room temperature.
Bokashi is another apartment-friendly method that ferments food waste (including meat and dairy) using special microbes. The bokashi system consists of an airtight bucket with a spigot to drain liquid fertilizer. After fermentation, the pre-compost needs burying or further processing, but it’s odorless and compact during the indoor phase.
Electric composters like the FoodCycler have also hit the market, processing scraps into dry, odorless soil amendment within hours. They’re pricey but require zero maintenance beyond emptying.
The key to successful indoor composting? Proper management to prevent odors and pests, which means balancing green and brown materials just like outdoor composting.
Building a DIY compost bin on a budget
Why drop $100+ on a store-bought bin when you can build one for a fraction of the cost?
The simplest DIY bin requires just a few wooden pallets. Grab four free pallets from local businesses (just ask—they often give them away), stand them up in a square, and secure the corners with wire or screws. Boom—instant compost bin.
For an even cheaper option, use chicken wire formed into a cylinder and secured with zip ties. Total cost? Under $20.
Got old trash cans collecting dust? Drill holes throughout for airflow, cut out the bottom, and you’ve got a decent composter for zero dollars.
The five-star DIY option is the three-bin system: one bin for fresh materials, one for actively composting materials, and one for finished compost. Build dividers between sections using plywood or more pallets.
Remember to include a removable front panel or door for easy access when harvesting. And don’t stress about perfection—even an imperfect DIY bin beats throwing kitchen scraps in the trash any day.
Compost Ingredients: What Goes In (And What Stays Out)

Green materials that accelerate decomposition
Ever tossed those banana peels and wondered what happens next? Green materials are the nitrogen-rich superstars of your compost pile. They’re the fuel that gets microbes excited and working overtime.
These nitrogen-packed goodies include:
- Fresh grass clippings (the smell of weekend lawn mowing)
- Vegetable scraps (carrot tops, pepper cores, onion skins)
- Coffee grounds and filters (yep, your morning brew helps)
- Fresh leaves and plant trimmings
- Fruit peels and cores
The magic ratio? About one-third green materials to two-thirds brown. Too many greens and your pile turns into a soggy, smelly mess. Not cute.
Brown materials that provide structure and carbon
Brown materials are the backbone of your compost pile. They add structure, allow airflow, and balance out all those eager greens.
What counts as brown gold:
- Dry leaves (fall’s gift to composters)
- Cardboard (rip up those Amazon boxes)
- Newspaper and junk mail (finally, a use for it)
- Paper egg cartons
- Twigs and small branches
- Straw or hay
- Dryer lint (yes, really!)
Browns prevent compaction and keep your pile from becoming a swampy disaster. They’re carbon-rich, which balances the nitrogen from greens. Think of them as the calm, steady partner to your excitable green materials.
Kitchen scraps that create nutrient-rich compost
Your kitchen is a compost goldmine. Those scraps you’d normally trash? They’re packed with nutrients your garden craves.
Everyday kitchen heroes include:
- Fruit and vegetable scraps (even the moldy strawberry you forgot)
- Eggshells (crushed for faster breakdown)
- Coffee grounds and tea bags (remove staples)
- Nutshells (except walnut, which can be toxic)
- Bread and grains (in moderation)
- Old herbs and spices
Chop larger scraps into smaller pieces to speed up decomposition. The smaller the better – your compost microbes aren’t exactly equipped with steak knives.
Collect scraps in a countertop container and empty it every few days. Trust me, your nose will thank you.
Surprising household items you can compost
Beyond the kitchen lurk compostable treasures you might not have considered.
Unexpected compost-friendly items:
- Hair (yours, your pet’s, whatever)
- Nail clippings (weird but wonderful)
- 100% cotton swabs and balls
- Wine corks (the natural ones, not plastic)
- Vacuum cleaner contents (if you don’t have synthetic carpets)
- Cotton clothing (ripped into small pieces)
- Fireplace ashes (in small amounts)
- Matchsticks and toothpicks
That old cotton t-shirt with holes? Cut it up and compost it. Paper towel tubes? In they go. Just make sure these items are free from synthetic materials, dyes, or chemicals.
Common materials to avoid for a healthy compost pile
Not everything belongs in paradise. Some materials can harm your compost or attract unwanted visitors.
Keep these troublemakers out:
- Meat, fish, and dairy (hello, pests and odors)
- Oils and fats (slows decomposition)
- Pet waste from cats and dogs (contains pathogens)
- Diseased plants (spreads problems)
- Synthetic fertilizer-treated yard waste
- Pressure-treated wood
- Coal or charcoal ash (contains harmful substances)
- Colored or glossy paper (toxic dyes)
Citrus peels and onions are controversial – they’re fine in moderation, but too many can kill off helpful worms. And while some composting enthusiasts include small amounts of bread and pasta, others avoid them completely since they can attract rodents.
Mastering the Composting Process
A. Achieving the perfect green-to-brown ratio
The secret to compost that practically makes itself? Getting that green-to-brown ratio right. Think of it as the perfect recipe – too much of either ingredient and things go sideways fast.
Greens are your nitrogen-rich materials: coffee grounds, veggie scraps, fresh grass clippings. They’re the power players that heat things up and speed decomposition.
Browns are your carbon sources: fallen leaves, cardboard, newspaper, wood chips. They create air pockets and give structure to your pile.
The magic happens at about 3 parts brown to 1 part green. But honestly? Most backyard composters (including me) don’t measure with scientific precision. I just eyeball it. If your pile smells funky or looks slimy, you’ve got too many greens. Toss in some browns. If nothing’s happening and decomposition seems frozen in time, add more greens to fire things up.
B. Proper layering techniques for faster decomposition
Composting isn’t just tossing stuff in a pile – it’s building a decomposition lasagna!
Start with a 4-6 inch layer of coarse browns at the bottom – think twigs or chopped branches. This creates crucial air flow. Next, add a 2-3 inch green layer, then another brown layer. Keep alternating.
The game-changer most folks miss? Chop everything smaller. Smaller pieces = more surface area = faster breakdown. That whole cabbage might take forever, but chopped into chunks? Gone in weeks.
My favorite trick is sprinkling a thin layer of finished compost or garden soil between layers. It’s like adding starter cultures that kickstart the whole process.
C. Moisture management: keeping your compost “damp as a wrung-out sponge”
Water content makes or breaks your compost pile. Too dry? Microbes can’t do their job. Too wet? Hello, stinky anaerobic mess.
The perfect compost feels like a wrung-out sponge – damp but not dripping. Squeeze a handful – you should get just a few drops of water. No drops means it’s too dry. Water streaming out? Way too wet.
During summer months, I check moisture weekly. A quick peek under the pile’s surface tells you everything – the center should feel cool and moist. If it’s bone dry, add water gradually with a watering can, mixing as you go.
Rainy season problems? Cover your pile with a tarp that allows some airflow but prevents flooding. Or build your bin with a slight roof overhang to control water input.
D. Aeration strategies to prevent odors and speed breakdown
Oxygen is the unsung hero of successful composting. Those beneficial microbes need to breathe, folks!
The simplest aeration method? Turn your pile. I use a garden fork every 1-2 weeks to flip materials from the outside to the center. Not just random poking – I completely restructure the pile, bringing bottom materials to the top.
Can’t turn regularly? No problem. Build passive aeration into your system:
- Insert perforated PVC pipes vertically through your pile
- Place coarse materials (corn stalks, twigs) throughout
- Use a compost aerator tool (looks like a corkscrew on a stick)
Notice rotten egg smells? That’s your pile screaming for oxygen. Turn it immediately, add coarse browns, and consider a different bin design for your next batch.
The payoff for proper aeration isn’t just smell prevention – it’s compost that finishes in months rather than years. Your plants will thank you.
Troubleshooting Common Composting Challenges
A. Eliminating unpleasant odors from your compost
Got a stinky compost pile? You’re not alone. A smelly compost pile is usually crying out for help.
The number one cause of compost odors is too much nitrogen-rich material (your food scraps and green stuff) without enough carbon (browns like leaves and paper). When this happens, your pile gets soggy and goes anaerobic – meaning it’s decomposing without oxygen. And trust me, that smells awful.
Quick fixes:
- Add more browns ASAP – dry leaves, shredded newspaper, cardboard
- Turn your pile to get oxygen flowing through it
- Make sure your pile isn’t too compacted
Prevention is even better than cure. Aim for that magical 3:1 ratio of browns to greens. And avoid adding meat, dairy, oils or pet waste – these guys are notorious stink-makers.
B. Dealing with pests and unwanted visitors
Nothing bursts your composting bubble quite like lifting the lid to find a family of rats has moved in. Yikes.
Rodents, flies, and other critters visit your compost for three reasons: food, shelter, and warmth. Here’s how to send them packing:
- Bury fresh food scraps at least 8 inches deep in the pile
- Avoid meat, dairy, and oils (seriously, just don’t)
- Use a rodent-proof bin with a secure lid and no holes larger than 1/4 inch
- Turn your pile regularly to disrupt any nesting attempts
For fruit flies, cover new additions with a layer of browns. Some folks keep a dedicated container of dried leaves right next to their compost bin for this purpose.
C. Solutions for compost that’s too wet or too dry
Finding the perfect moisture balance feels like goldilocks territory – not too wet, not too dry, but just right. Your compost should feel like a wrung-out sponge.
If your pile’s too wet (slimy, soggy, maybe smelly):
- Add dry browns like leaves, straw, or shredded paper
- Turn the pile to improve air circulation
- Consider covering it during heavy rains
- Add coarse materials like small twigs to create air pockets
Dealing with a bone-dry pile:
- Sprinkle with water from a hose (don’t drown it)
- Add moist green materials
- If you’re in a dry climate, position your bin in partial shade
- Try covering your pile to retain moisture
D. Fixing a slow-decomposing pile
Watching paint dry is more exciting than waiting for some compost piles to break down. If your pile seems stuck in suspended animation, here’s how to kick it into gear:
- Check the size – small piles (less than 3’×3’×3′) struggle to heat up
- Turn it more frequently to aerate and mix materials
- Chop materials into smaller pieces for faster breakdown
- Add a nitrogen boost with grass clippings or a thin layer of soil from your garden
- Ensure proper moisture (that wrung-out sponge feel)
The secret sauce to speedy decomposition is surface area. The smaller your inputs, the faster microbes can break them down. Chopping kitchen scraps or running over leaves with your lawn mower makes a massive difference.
Sometimes slow decomposition happens when your pile freezes in winter. That’s normal – just be patient and activity will resume when temperatures rise.
Harvesting and Using Your “Garden Gold”
A. Recognizing when your compost is ready to use
You’ve been patiently tending your compost pile for months, and now you’re wondering – is it ready? Here’s the scoop: finished compost looks nothing like the scraps you tossed in. It transforms into a dark, crumbly material that smells earthy and sweet – kind of like the forest floor after rain.
The ultimate test? Grab a handful. Ready compost feels like moist chocolate cake – crumbly yet slightly damp. The original ingredients should be completely unrecognizable – no banana peels or eggshells hanging around.
Still not sure? Try the bag test. Put some compost in a sealed plastic bag for three days. When you open it, it should smell pleasant, not sour or rotten. If it stinks, it needs more time to break down.
Temperature is another dead giveaway. A finished pile cools down to ambient temperature, unlike an active pile that’s warm to hot in the center.
B. Simple sifting techniques for fine-textured compost
Nobody wants chunks of wood or half-decomposed materials in their garden beds. That’s where sifting comes in.
The easiest DIY sifter? Take a wooden frame and staple 1/2-inch hardware cloth across it. Place it over a wheelbarrow, shovel compost onto the screen, and shake gently. The good stuff falls through while the chunky bits stay on top.
No time for building? A regular garden sieve works in a pinch for small batches. Or repurpose an old milk crate lined with hardware cloth.
Those chunky leftovers aren’t waste – they’re gold for your next compost batch! They act as ready-made activators full of beneficial microbes. Just toss them back in your new pile to jumpstart decomposition.
C. Best ways to apply compost to different plants
Different plants have different compost needs. Let’s break it down:
For veggie gardens, mix 2-3 inches of compost into the top 6 inches of soil before planting. During the growing season, add a thin layer around plants monthly as a mulch – stay about an inch away from stems to prevent rot.
Perennial flowers thrive with 1-2 inches worked gently around existing plants in spring or fall. Don’t disturb those roots!
For trees and shrubs, the drip line is your target zone. That’s the area under the outermost branches. Apply a 1-inch layer and scratch it in lightly.
Houseplants love compost too! Mix one part compost with four parts potting soil for repotting, or add a thin layer (1/4 inch) as a top dressing for existing plants.
Lawns? Spread a 1/4-inch layer in early spring or fall using a rake to distribute it evenly.
D. Extending compost benefits with compost tea
Think of compost tea as a power-packed liquid fertilizer. It’s basically compost steeped in water – capturing all those beneficial microbes and nutrients in liquid form.
The simplest method: Fill a burlap sack or old pillowcase with finished compost, tie it closed, and submerge it in a bucket of water. Let it steep for 3-5 days, stirring daily. The water turns a rich amber color when ready.
For actively aerated compost tea (AACT), add an aquarium bubbler to oxygenate the water during steeping. This boosts microbial activity dramatically.
Use your tea within 24 hours of finishing the brew – those microbes don’t stay active long. Apply it as a foliar spray during the cooler parts of the day or as a soil drench right at plant roots.
The beauty of compost tea? It delivers immediate nutrients while inoculating your soil with beneficial microbes. Plants respond within days – often showing greener leaves and stronger growth almost overnight.
Transforming your kitchen scraps into nutrient-rich compost doesn’t have to be complicated. With the right setup, proper ingredients, and a bit of patience, you can create “garden gold” that will nourish your plants and reduce household waste. From understanding the basics of decomposition to troubleshooting common issues like odors or pests, mastering the composting process is a rewarding journey that benefits both your garden and the environment.
Ready to get started? Set up your composting system today, whether it’s a simple backyard pile or a kitchen counter bin, and begin collecting those vegetable peels, coffee grounds, and yard trimmings. Remember to maintain the right balance of greens and browns, keep your compost adequately moist, and turn it regularly. Your garden will thank you with healthier plants, better yields, and vibrant growth – all from materials you would have otherwise thrown away.

As I website possessor I believe the content material here is rattling fantastic , appreciate it for your efforts. You should keep it up forever! Good Luck.
You are a very intelligent person!
Hey there! I could have sworn I’ve been to this blog before but after reading through some of the post I realized it’s new to me. Anyways, I’m definitely glad I found it and I’ll be bookmarking and checking back often!
I conceive other website owners should take this website as an model, very clean and fantastic user genial design and style.
Great wordpress blog here.. It’s hard to find quality writing like yours these days. I really appreciate people like you! take care
I’m very happy to read this. This is the type of manual that needs to be given and not the random misinformation that’s at the other blogs. Appreciate your sharing this best doc.
I love your blog.. very nice colors & theme. Did you create this website yourself? Plz reply back as I’m looking to create my own blog and would like to know wheere u got this from. thanks
An interesting discussion is worth comment. I think that you should write more on this topic, it might not be a taboo subject but generally people are not enough to speak on such topics. To the next. Cheers
An fascinating discussion is value comment. I believe that you need to write extra on this subject, it may not be a taboo subject but typically persons are not enough to speak on such topics. To the next. Cheers
Fantastic site. A lot of useful information here. I am sending it to a few friends ans also sharing in delicious. And certainly, thank you in your effort!
Its such as you learn my thoughts! You seem to understand a lot approximately this, such as you wrote the e-book in it or something. I feel that you can do with a few to power the message house a bit, but instead of that, this is great blog. A fantastic read. I will definitely be back.
Hello there, I found your blog by the use of Google at the same time as looking for a similar matter, your site got here up, it seems to be great. I have bookmarked it in my google bookmarks.
Some truly wonderful articles on this web site, thank you for contribution. “When he has ceased to hear the many, he may discern the One – the inner sound which kills the outer.” by H Hahn Blavatsky.
I’ve been absent for some time, but now I remember why I used to love this website. Thanks , I will try and check back more often. How frequently you update your site?
Great write-up, I’m regular visitor of one’s blog, maintain up the excellent operate, and It is going to be a regular visitor for a lengthy time.
Hi , I do believe this is an excellent blog. I stumbled upon it on Yahoo , i will come back once again. Money and freedom is the best way to change, may you be rich and help other people.
Glad to be one of many visitants on this amazing website : D.
I have recently started a site, the information you offer on this site has helped me tremendously. Thank you for all of your time & work.
I respect your piece of work, appreciate it for all the good articles.
I enjoy your writing style really enjoying this internet site.
Aw, this was a really nice post. In concept I wish to put in writing like this additionally – taking time and actual effort to make a very good article… however what can I say… I procrastinate alot and certainly not seem to get one thing done.
Some really interesting information, well written and loosely user pleasant.
This is very interesting, You’re a very skilled blogger. I’ve joined your feed and look forward to seeking more of your excellent post. Also, I have shared your site in my social networks!
Can you be more specific about the content of your article? After reading it, I still have some doubts. Hope you can help me.