How to Start a Small Balcony Garden?
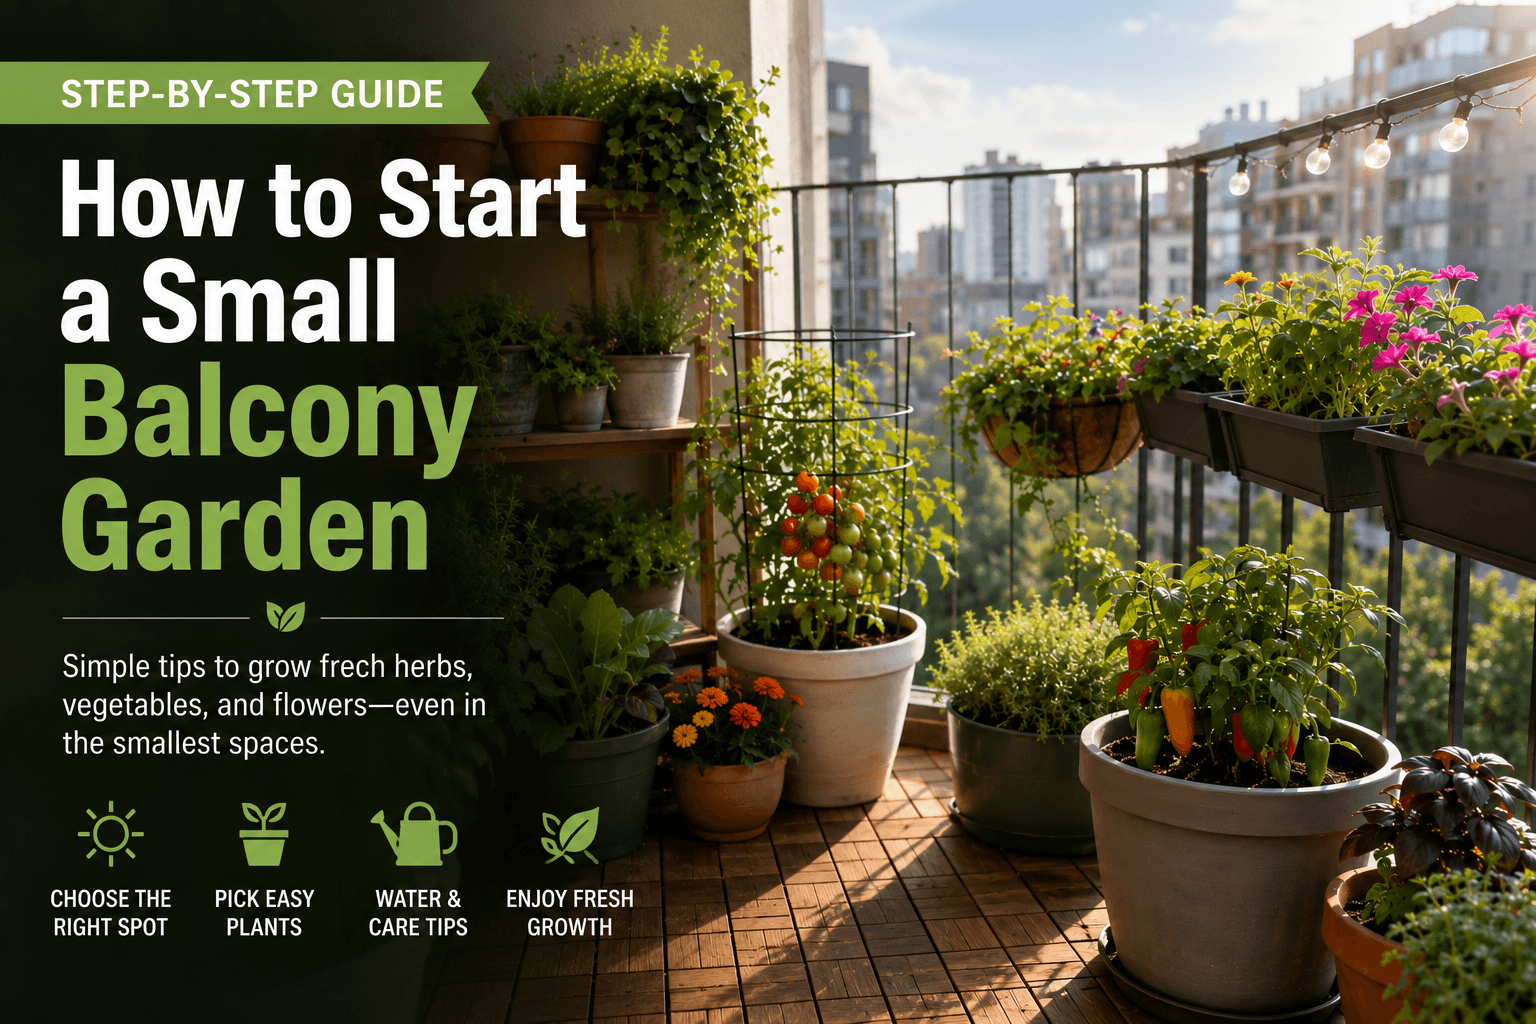
Starting a small balcony garden transforms any outdoor space into a green oasis that produces fresh herbs, vegetables, or beautiful flowers. This guide is perfect for apartment dwellers, renters, and anyone with limited outdoor space who wants to grow their own plants.
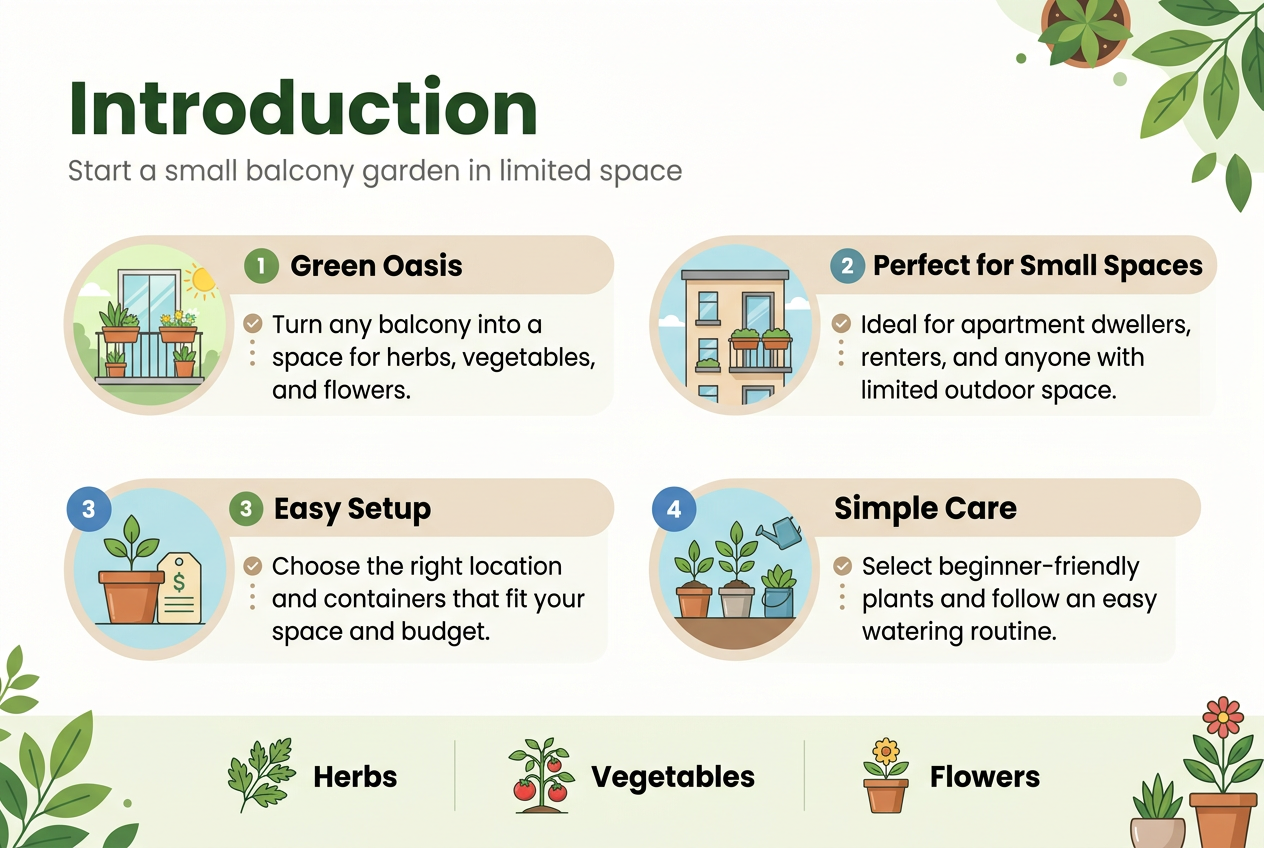
Creating your balcony garden doesn’t require a green thumb or expensive equipment. We’ll walk you through choosing the right location and containers that work for your space and budget. You’ll also learn how to select beginner-friendly plants that thrive in containers and set up simple watering routines that keep everything healthy without taking over your schedule.
Choose the Perfect Balcony Location and Assess Growing Conditions
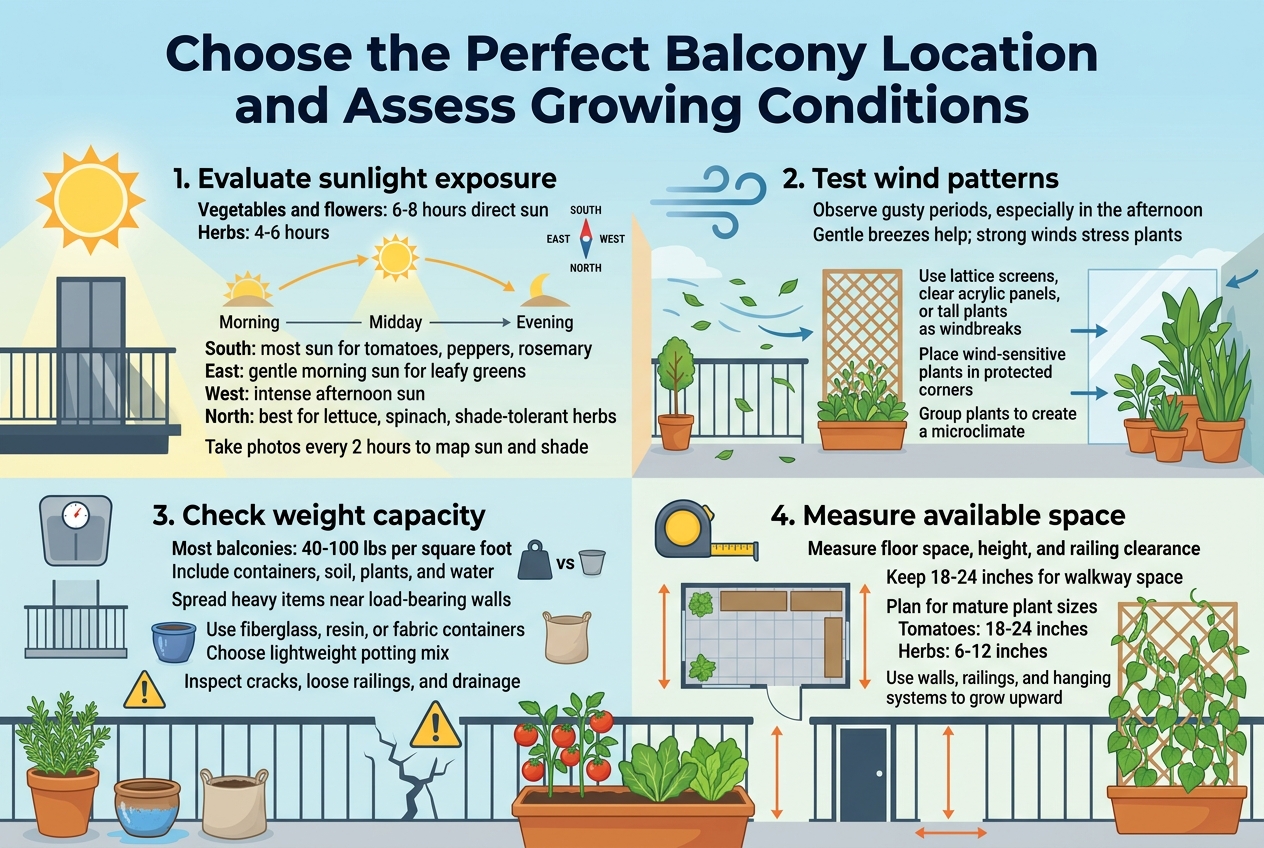
Evaluate sunlight exposure throughout the day
Understanding your balcony’s sunlight patterns forms the foundation of a successful balcony garden. Most vegetables and flowering plants need at least 6-8 hours of direct sunlight daily, while herbs can thrive with 4-6 hours. Start by observing your space at different times throughout one full day, noting when shadows fall and how long sunny spots last.
South-facing balconies typically receive the most intense sunlight, making them perfect for sun-loving tomatoes, peppers, and Mediterranean herbs like rosemary and thyme. East-facing spaces get gentle morning sun, ideal for leafy greens that can wilt in harsh afternoon heat. West-facing balconies catch intense afternoon sun, which works well for heat-tolerant plants but might require shade cloth during peak summer months. North-facing balconies receive the least direct sunlight, making them better suited for shade-tolerant plants like lettuce, spinach, and certain herbs.
Take photos of your balcony every two hours from sunrise to sunset to create a visual sunlight map. This helps you identify microclimates within your space – areas that stay cooler or warmer based on building shadows, overhangs, or neighboring structures. Buildings, trees, or other balconies above might cast shadows that change throughout the seasons as the sun’s angle shifts.
Test wind patterns and create windbreaks if needed
Wind can make or break your balcony garden success. While gentle breezes help prevent fungal diseases and strengthen plant stems, strong winds can snap branches, dry out soil quickly, and stress plants beyond recovery. High-rise balconies often experience stronger, more unpredictable wind patterns due to building effects that funnel and accelerate air movement.
Spend several days observing wind patterns at different times, noting particularly gusty periods. Most balconies experience stronger winds during afternoon hours when thermal currents are most active. Watch how existing items on your balcony move – lightweight chairs, hanging decorations, or even dust patterns can reveal wind corridors.
Create effective windbreaks using various strategies. Lattice screens or trellises work double-duty, providing wind protection while supporting climbing plants like peas or beans. Clear acrylic panels maintain views while blocking wind. For temporary solutions, tall plants like sunflowers or corn can act as living windbreaks for smaller, more delicate plants behind them.
Position wind-sensitive plants in protected corners or behind larger containers. Group plants together to create their own microclimate – the collective foliage helps reduce wind impact on individual plants. Avoid placing tall, top-heavy plants in the windiest spots unless they’re secured with stakes or heavy containers.
Check weight capacity and structural limitations
Safety comes first in balcony gardening. Most residential balconies can handle 40-100 pounds per square foot, but this varies significantly based on building age, construction type, and local building codes. Contact your building management or a structural engineer if you’re unsure about weight limits, especially in older buildings or condominiums with specific restrictions.
Calculate the total weight of your planned garden setup, including containers, soil, plants, and water. A large ceramic pot filled with wet soil can easily weigh 50-100 pounds. Multiply this by several containers, and you might exceed safe limits quickly. Heavy items should be positioned over load-bearing walls or supports rather than in the center of the balcony span.
Consider weight distribution carefully. Spread heavy containers around the perimeter where structural support is strongest. Use lightweight alternatives like fiberglass, resin, or fabric containers instead of heavy ceramic or concrete pots. Choose lightweight potting mixes over garden soil – they typically weigh 25-50% less while providing better drainage.
Check for any existing structural issues like cracks, loose railings, or drainage problems that might worsen with additional weight. Review your lease agreement or homeowner association rules regarding balcony modifications, as some buildings restrict certain types of containers or installations.
Measure available space for optimal plant placement
Accurate measurements help maximize your growing space while ensuring plants have room to flourish. Measure not just floor space, but also vertical dimensions, including ceiling height and railing configurations. Many successful balcony gardens grow upward using walls, railings, and hanging systems to multiply growing space.
Create a scaled drawing of your balcony, marking permanent features like doors, windows, railings, and any utility connections. Note areas you need to keep clear for foot traffic, furniture, or building maintenance access. Most balconies benefit from keeping at least 18-24 inches of walkway space.
Plan plant spacing based on mature sizes rather than transplant sizes. A single tomato plant needs 18-24 inches of space, while herb plants can thrive in 6-12 inch spacing. Consider vertical growth habits too – vining plants like cucumbers or pole beans need support structures and overhead clearance.
Map out sun and shade zones on your drawing, then match appropriate plants to each area. This prevents overcrowding and competition for light. Leave space for maintenance access – you’ll need to reach all plants for watering, pruning, and harvesting. Consider seasonal changes too, as some plants may need different positioning as weather patterns shift throughout the growing season.
Select the Right Containers and Growing Systems

Choose Drainage-Friendly Pots and Planters
The foundation of any successful balcony garden starts with containers that prevent waterlogged roots and plant diseases. Drainage holes are absolutely non-negotiable – without them, excess water sits at the bottom of containers, creating the perfect environment for root rot and fungal issues that can quickly kill your plants.
Look for pots with multiple drainage holes rather than just one central hole. Multiple holes ensure water can escape even if one gets blocked by roots or debris. If you fall in love with a container that lacks proper drainage, you can drill holes yourself using a masonry bit for ceramic pots or a regular drill bit for plastic ones.
Terra cotta and unglazed ceramic pots offer excellent drainage properties since they’re porous and allow excess moisture to evaporate through the walls. However, they dry out faster, which means more frequent watering. Plastic containers retain moisture longer but can trap too much water if drainage isn’t adequate.
Avoid containers with attached saucers unless they’re designed to be removable. Standing water in saucers defeats the purpose of good drainage. If you need to protect your balcony surface, use separate saucers and empty them regularly.
Self-watering planters work well for busy gardeners, but choose ones with overflow holes to prevent waterlogging during heavy rains. These systems maintain consistent moisture without drowning your plants.
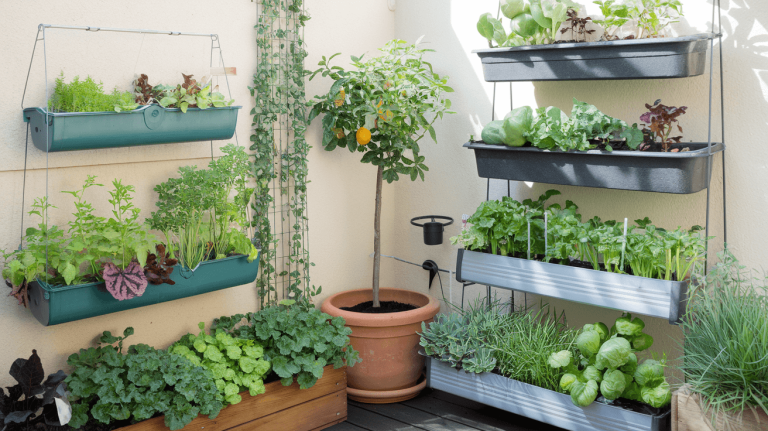
Consider Vertical Growing Solutions to Maximize Space
Balcony gardens benefit enormously from thinking upward rather than outward. Vertical growing systems multiply your planting space without crowding your balcony floor, making room for seating and movement.
Wall-mounted planters create living walls that transform bare balcony walls into productive growing space. These systems work particularly well for herbs, lettuce, and strawberries. Choose planters with built-in water collection systems to prevent dripping onto lower levels.
Tiered plant stands and ladder-style shelving allow you to stack containers at different heights. This approach works great for plants with varying light requirements – sun-loving plants on top tiers and shade-tolerant varieties below.
Hanging baskets expand your growing area overhead and work beautifully for trailing plants like cherry tomatoes, trailing strawberries, and cascading herbs. Install sturdy brackets that can handle the weight of soil and water.
Railing planters hook directly onto balcony rails, perfect for herbs and small vegetables. These specialized containers don’t take up floor space and put plants at eye level for easy harvesting.
Trellis systems support climbing plants like peas, beans, and cucumbers. Attach trellises to walls or use freestanding versions that won’t damage your balcony structure.
Pick Appropriate Container Sizes for Different Plant Types
Container size directly impacts plant health and productivity. Too small, and plants become root-bound and struggle to access nutrients and water. Too large, and you waste space while soil stays too wet.
Small containers (6-8 inches diameter) work perfectly for herbs like basil, oregano, and chives. Lettuce and other leafy greens also thrive in these compact spaces. These containers are lightweight and easy to rearrange as seasons change.
Medium containers (10-14 inches diameter) accommodate larger herbs like rosemary and sage, plus smaller vegetables like peppers and cherry tomatoes. These sizes offer good root space without overwhelming small balconies.
Large containers (16+ inches diameter) support bigger plants like full-size tomatoes, eggplants, and small fruit trees. Deep containers (12+ inches) work best for root vegetables like carrots and potatoes.
Window boxes maximize narrow spaces and work well for herb collections or lettuce rows. Standard boxes measure 24-36 inches long and provide enough room for multiple plants.
Consider weight when choosing larger containers. Wet soil weighs significantly more than dry soil, and balconies have weight limits. Plastic and fiberglass containers weigh less than ceramic or concrete options while still providing adequate growing space.
Square containers use space more efficiently than round ones, fitting together without gaps. This makes them ideal for creating organized growing areas that maximize every inch of your balcony garden.
Pick Easy-to-Grow Plants for Balcony Success
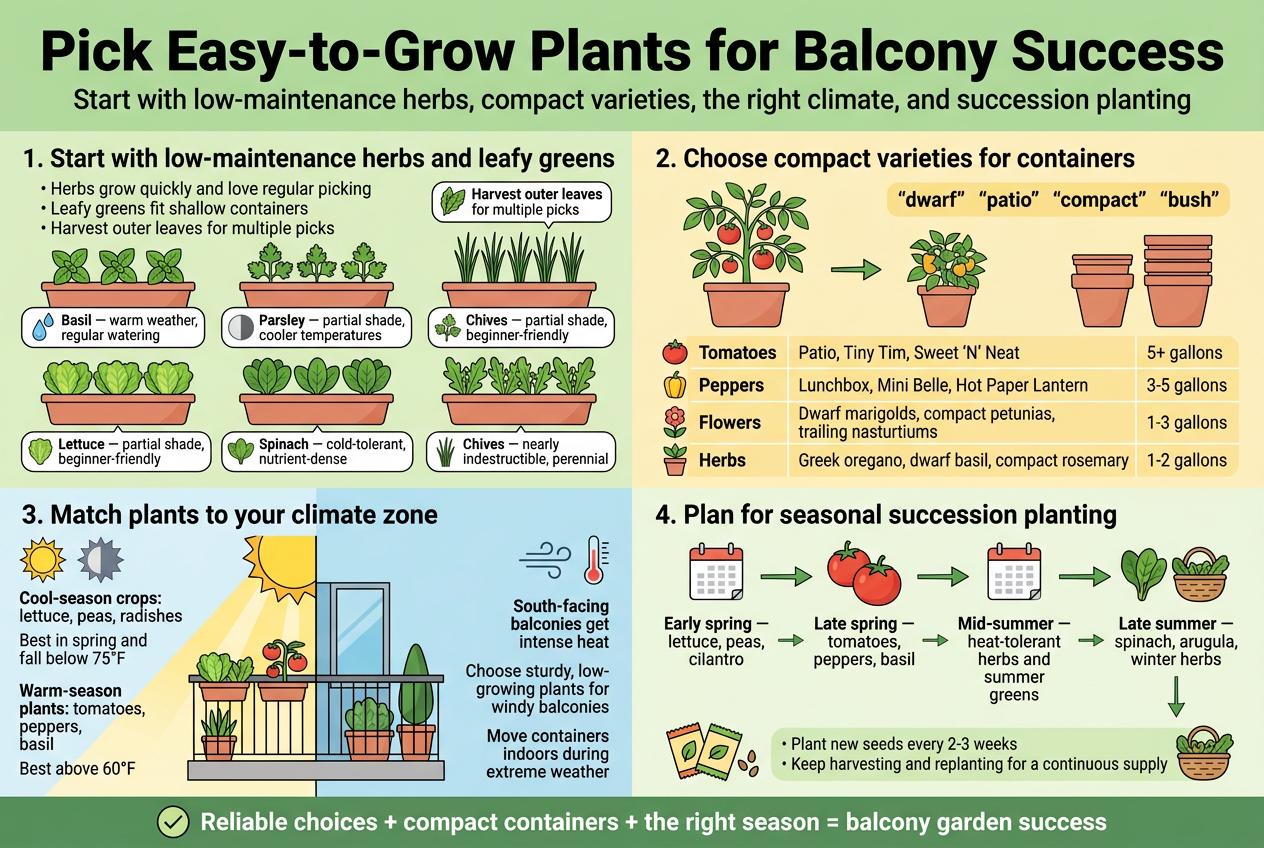
Start with low-maintenance herbs and leafy greens
Herbs make perfect beginner plants for your balcony garden because they’re practically foolproof and give you instant satisfaction. Basil, parsley, cilantro, and chives grow quickly and don’t mind being picked regularly – in fact, they love it. These culinary powerhouses thrive in small containers and provide fresh ingredients for your kitchen within weeks of planting.
Leafy greens like lettuce, spinach, and arugula are equally forgiving and grow fast enough to keep you motivated. They don’t need deep root systems, making them ideal for shallow containers. Plus, you can harvest outer leaves while the center keeps growing, giving you multiple harvests from a single plant.
Start with these reliable options:
- Basil: Needs warm weather and regular watering
- Parsley: Tolerates partial shade and cooler temperatures
- Lettuce: Grows well in partial shade, perfect for beginners
- Spinach: Cold-tolerant and nutrient-dense
- Chives: Nearly indestructible and comes back year after year
Choose compact varieties suited for container growing
Regular garden varieties often grow too large for balcony containers, but plant breeders have created compact versions specifically for small spaces. Look for words like “dwarf,” “patio,” “compact,” or “bush” on seed packets and plant tags.
Cherry tomatoes work better than full-size varieties in containers. Determinate tomato types stay smaller and produce fruit all at once, while indeterminate types keep growing and producing but need more support. Peppers, especially smaller hot varieties, adapt well to container life and produce heavily in small spaces.
For flowers, choose compact varieties that won’t overwhelm your space:
| Plant Type | Compact Varieties | Container Size |
|---|---|---|
| Tomatoes | Patio, Tiny Tim, Sweet ‘N’ Neat | 5+ gallons |
| Peppers | Lunchbox, Mini Belle, Hot Paper Lantern | 3-5 gallons |
| Flowers | Dwarf marigolds, compact petunias, trailing nasturtiums | 1-3 gallons |
| Herbs | Greek oregano, dwarf basil, compact rosemary | 1-2 gallons |
Select plants that thrive in your specific climate zone
Your climate zone determines which plants will survive and thrive on your balcony garden. Cool-season crops like lettuce, peas, and radishes grow best in spring and fall when temperatures stay below 75°F. Warm-season plants like tomatoes, peppers, and basil need temperatures consistently above 60°F to flourish.
Pay attention to your balcony’s microclimate too. South-facing balconies get intense heat that Mediterranean herbs love but might stress cool-season greens. North-facing spaces stay cooler and work well for lettuce and other shade-tolerant plants.
Wind exposure affects plant selection significantly. Choose sturdy, low-growing varieties if your balcony catches strong winds. Trailing plants and tall, thin varieties often struggle in windy conditions and may need extra support or protection.
Research your local growing season and frost dates. Many balcony gardeners can extend their season by moving containers indoors during extreme weather, giving you more flexibility than ground-based gardens.
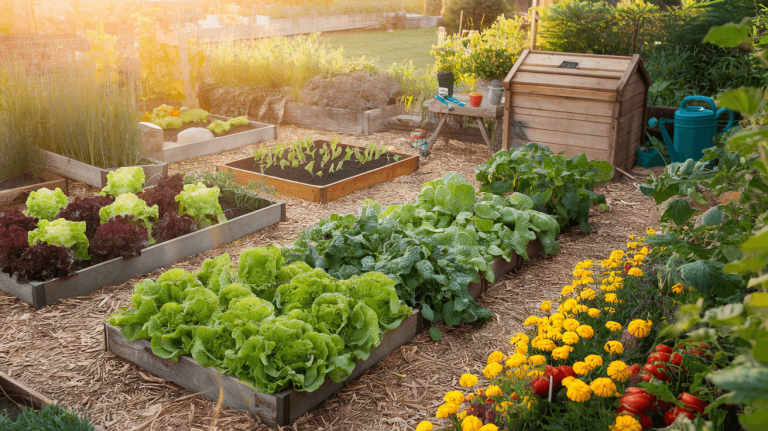
Plan for seasonal succession planting
Succession planting keeps your balcony garden producing fresh food throughout the growing season instead of getting overwhelmed with everything ready at once. Plant new seeds every 2-3 weeks for crops like lettuce, radishes, and herbs to maintain a continuous harvest.
Plan your planting schedule around your climate:
- Early spring: Start cool-season crops like lettuce, peas, and cilantro
- Late spring: Plant warm-season favorites like tomatoes, peppers, and basil
- Mid-summer: Start another round of heat-tolerant herbs and summer greens
- Late summer: Begin fall crops like spinach, arugula, and winter herbs
Keep a simple planting calendar to track when to start new seeds. Many herbs can be planted multiple times throughout the season, while others like tomatoes typically get planted once for the entire season. This staggered approach ensures you always have something growing and ready to harvest in your balcony garden.
Create Proper Soil Mix and Drainage Solutions
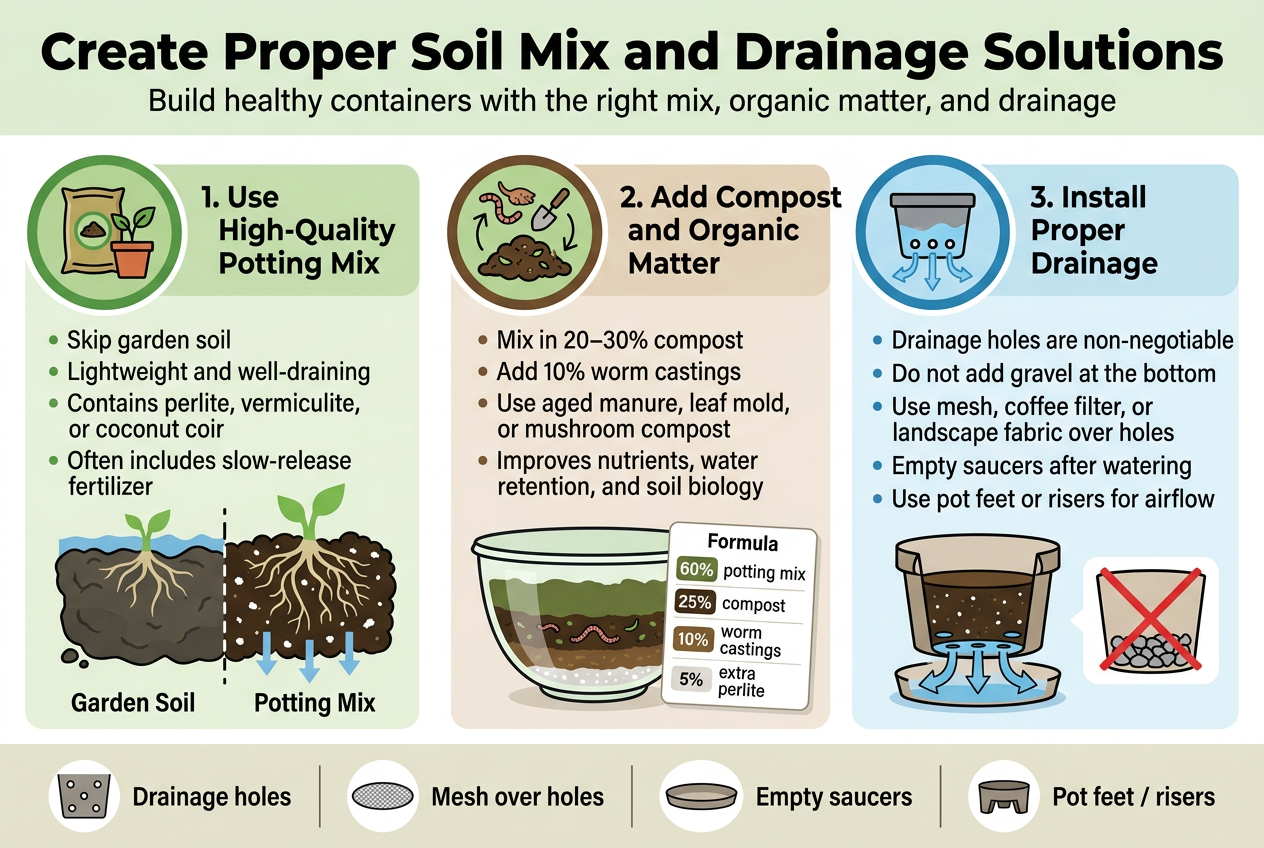
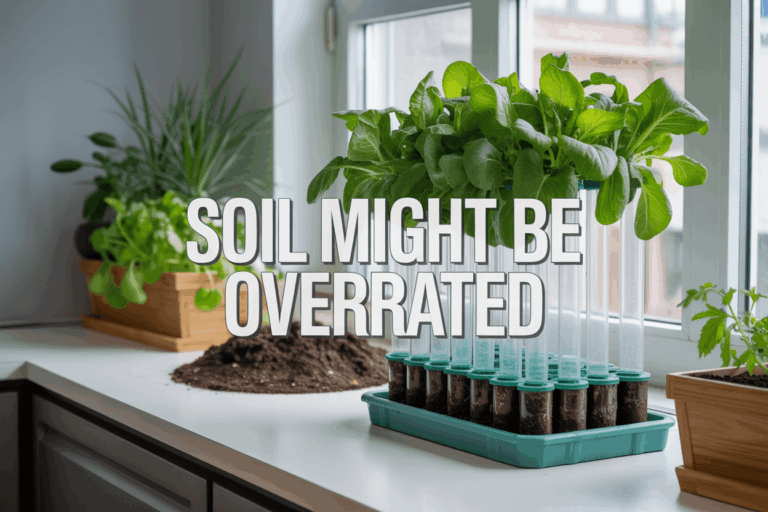
Use high-quality potting mix instead of garden soil
The foundation of your balcony garden success starts with choosing the right growing medium. Regular garden soil might seem like the obvious choice, but it’s actually one of the worst decisions you can make for container gardening. Garden soil becomes incredibly heavy when wet, creating a nightmare for your balcony’s weight limits and your back when moving containers.
More importantly, garden soil compacts severely in containers, choking out air pockets that roots desperately need to breathe. This compaction leads to poor drainage, stunted growth, and often plant death. Garden soil also harbors pests, diseases, and weed seeds that you definitely don’t want introducing to your controlled balcony environment.
High-quality potting mix, on the other hand, is specifically engineered for container growing. It’s lightweight, well-draining, and maintains its structure even after repeated watering cycles. Look for mixes that contain perlite, vermiculite, or coconut coir, which help maintain proper aeration and moisture retention.
Premium potting mixes come pre-charged with slow-release fertilizers, giving your plants the nutrients they need for the first few months of growth. While these mixes cost more upfront than garden soil, they’ll save you money in the long run by keeping your plants healthy and productive.
Add compost and organic matter for nutrient density
Even the best commercial potting mix benefits from organic amendments that boost its nutrient content and improve soil biology. Adding compost transforms ordinary potting mix into a living, breathing ecosystem that supports robust plant growth.
Compost provides a slow, steady release of nutrients that plants can access as needed. Unlike synthetic fertilizers that can burn plants if over-applied, compost feeds plants gently while improving the soil’s water-holding capacity and structure. Mix in about 20-30% compost by volume to your potting mix for optimal results.
Worm castings are another excellent organic amendment that’s particularly valuable for balcony garden containers. These nutrient-rich pellets are odorless, won’t attract pests, and provide a gentle but constant source of nitrogen, phosphorus, and potassium. Add about 10% worm castings to your soil mix.
Aged manure, leaf mold, and mushroom compost are other organic materials that dramatically improve soil quality. These amendments not only feed your plants but also support beneficial microorganisms that help plants resist diseases and absorb nutrients more efficiently.
Create your custom soil blend by mixing 60% high-quality potting mix, 25% compost, 10% worm castings, and 5% additional perlite for extra drainage. This combination provides everything your balcony garden plants need to thrive.
Install proper drainage systems to prevent root rot
Drainage is absolutely critical for balcony garden success, yet it’s where most beginners make fatal mistakes. Poor drainage kills more container plants than any other single factor, turning healthy roots into mushy, rotting masses that can’t support plant life.
Every container must have drainage holes in the bottom – this is non-negotiable. If you’ve fallen in love with a container without holes, drill them yourself or use it as a decorative outer pot for a properly draining inner container. Aim for one drainage hole per 6 inches of container diameter.
The “gravel in the bottom” myth needs to die. Despite what you might have heard, placing rocks, pottery shards, or gravel in container bottoms actually worsens drainage by creating a perched water table. Water sits in the soil just above the gravel layer instead of draining freely through the holes.
Instead, place a coffee filter, landscape fabric, or fine mesh screen over drainage holes. This prevents soil from washing out while allowing water to flow freely. For deeper containers, consider adding a layer of coarse perlite mixed throughout the bottom third of your soil mix.
Saucers and drip trays are essential for balcony gardens to protect flooring and neighbors below. Empty these regularly – standing water in saucers can be just as damaging as poor container drainage. Check saucers 30 minutes after watering and dump any accumulated water.
For heavy containers that can’t be easily moved, install pot feet or risers to elevate containers slightly above their saucers. This small gap allows air circulation under the pot and prevents the container from sitting in water even if you forget to empty the saucer promptly.
Establish Smart Watering and Maintenance Routines
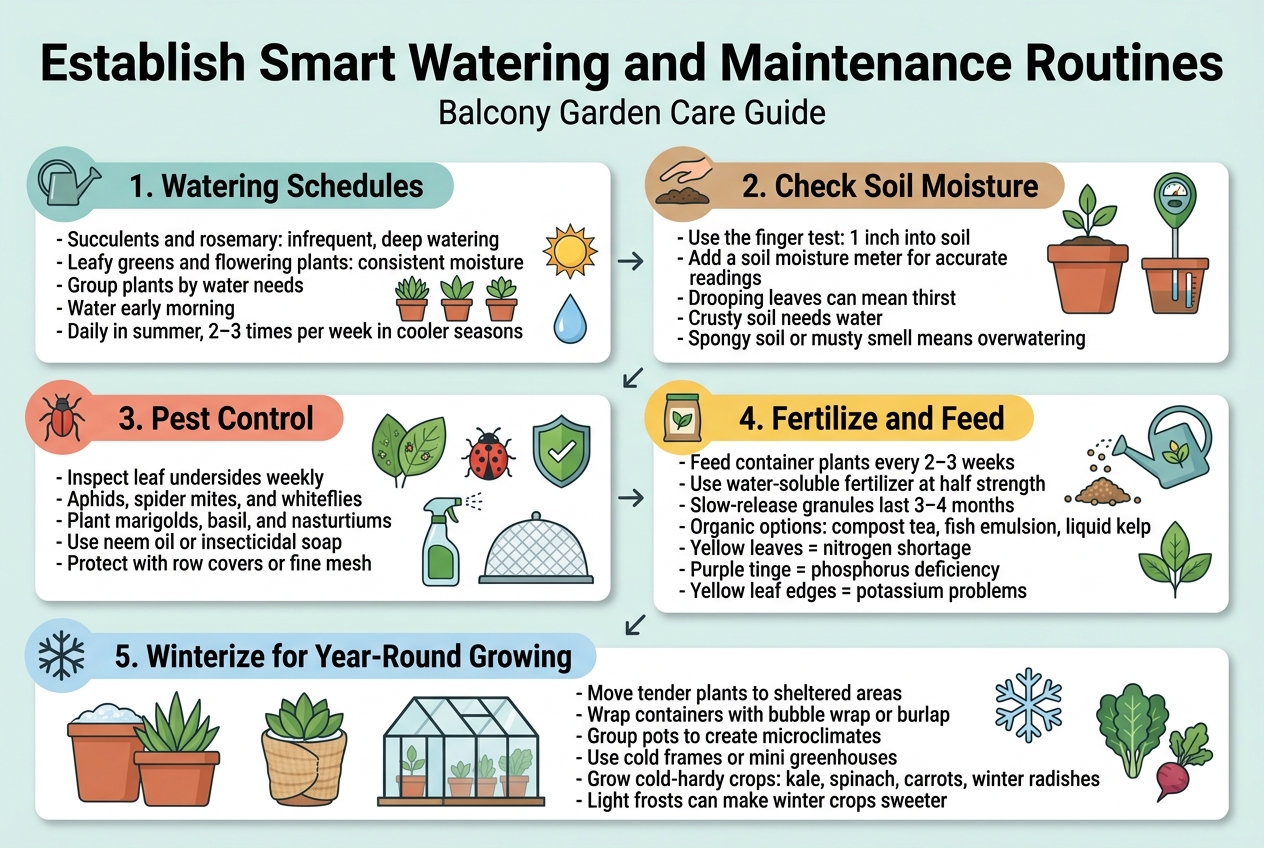
Set up efficient watering schedules based on plant needs
Creating a watering schedule for your balcony garden requires understanding that different plants have vastly different needs. Succulents and herbs like rosemary thrive with infrequent, deep watering sessions, while leafy greens and flowering plants need more consistent moisture. Start by grouping your containers based on similar water requirements to streamline your routine.
The “finger test” becomes your best friend – stick your finger about an inch into the soil to check moisture levels before watering. Most vegetables and flowers prefer soil that feels slightly moist but not soggy. Early morning watering works best because it gives plants time to absorb moisture before the heat of the day, reducing evaporation and preventing fungal issues that can develop when leaves stay wet overnight.
Container plants dry out faster than ground gardens, especially on windy balconies or those with direct sun exposure. During peak summer months, you might need to water daily, while cooler seasons may require watering only two to three times per week. Weather patterns also play a role – rainy periods mean backing off your schedule, while hot, dry spells call for more frequent attention.
Monitor soil moisture levels regularly
Consistent moisture monitoring prevents both drought stress and root rot, two common killers of balcony garden plants. Beyond the finger test, invest in an inexpensive soil moisture meter for more accurate readings. These tools give you precise moisture levels at different depths, helping you understand how water moves through your containers.
Watch for visual cues that indicate watering needs. Drooping leaves often signal thirst, but be careful not to confuse this with natural afternoon wilting during hot days. Soil that pulls away from container edges or feels hard and crusty needs immediate attention. Conversely, soil that feels spongy or has a musty smell indicates overwatering problems.
Different container materials affect moisture retention rates. Terracotta pots dry out quickly due to their porous nature, while plastic containers hold moisture longer. Factor this into your monitoring routine and adjust watering frequency accordingly.
Implement pest control strategies for container gardens
Balcony gardens face unique pest challenges compared to ground-level gardens. Aphids, spider mites, and whiteflies commonly attack container plants, especially when stress from inadequate watering makes plants vulnerable. Regular inspection becomes crucial – check the undersides of leaves weekly where many pests like to hide.
Companion planting works wonderfully in balcony garden containers. Planting marigolds, basil, or nasturtiums alongside your vegetables naturally deters many common pests. These aromatic plants create a protective barrier while adding beauty and functionality to your space.
Neem oil spray provides an organic solution for most pest issues. Mix according to package directions and apply during cooler parts of the day to avoid leaf burn. For severe infestations, insecticidal soap offers another gentle but effective option. Always test any treatment on a small area first.
Physical barriers like row covers or fine mesh can protect vulnerable plants during peak pest seasons. These lightweight covers allow air and water through while keeping flying insects away from your plants.
Plan for fertilization and plant nutrition
Container plants need more frequent feeding than garden plants because nutrients wash out through drainage holes with each watering. A balanced, water-soluble fertilizer applied every two to three weeks keeps most vegetables and flowers thriving. Always dilute fertilizer to half the recommended strength to prevent burning tender container plant roots.
Slow-release granular fertilizers mixed into potting soil at planting time provide steady nutrition for three to four months. This approach works particularly well for herbs and perennial plants that stay in the same container for extended periods.
Organic options like compost tea or fish emulsion provide gentle, natural nutrition. These organic fertilizers improve soil structure while feeding plants, creating healthier growing conditions overall. Liquid kelp meal adds trace minerals often missing from standard fertilizers.
Watch for signs of nutrient deficiency – yellowing leaves often indicate nitrogen shortage, while poor flowering might signal phosphorus needs. Purple leaf tinge usually means phosphorus deficiency, while yellow leaf edges suggest potassium problems.
Prepare winterization techniques for year-round growing
Year-round balcony gardening requires adapting to seasonal changes and protecting plants from temperature extremes. Move tender plants to sheltered areas when temperatures drop, or bring containers indoors if space allows. Hardy herbs like rosemary and thyme often survive mild winters outdoors with proper protection.
Insulate containers using bubble wrap, burlap, or specialized plant covers. Wrap the containers themselves, not just the plants, because roots in pots are more vulnerable to freezing than those insulated by ground soil. Group containers together to create microclimates that provide mutual protection.
Cold frames or mini greenhouses extend the growing season significantly. These structures trap heat during sunny winter days while protecting plants from harsh winds and temperature swings. Even a simple clear plastic sheeting setup can add several degrees of protection.
Switch to cold-hardy varieties for winter growing. Kale, spinach, carrots, and winter radishes handle cold temperatures well and provide fresh produce during colder months. These crops often taste sweeter after light frosts, making winter balcony gardening rewarding beyond just having fresh food.
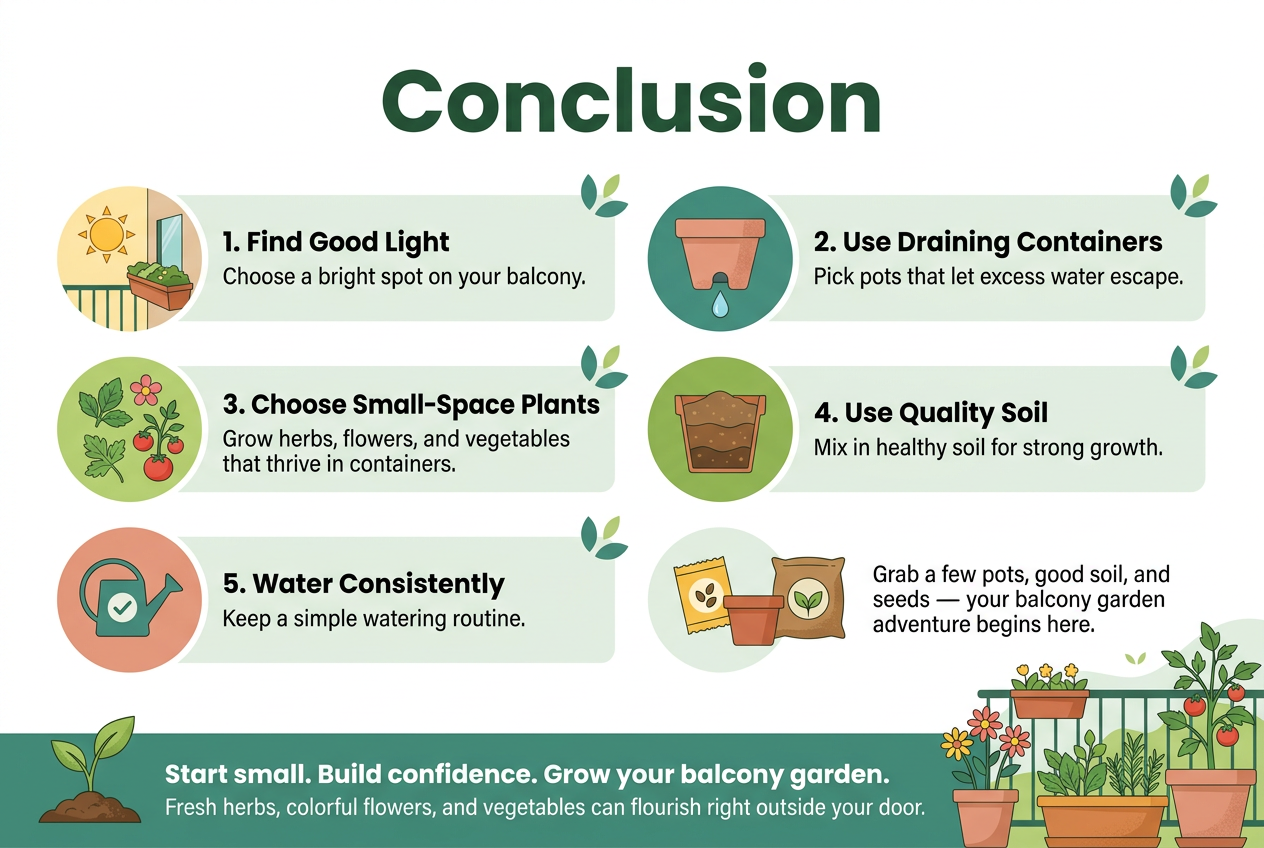
Growing your own little green space on a balcony doesn’t have to be complicated or expensive. By focusing on the basics—finding the right spot with good light, using containers that drain well, picking plants that actually thrive in small spaces, mixing quality soil, and staying on top of simple watering routines—you’ll have fresh herbs, colorful flowers, or even vegetables growing right outside your door. The best part is watching something you planted with your own hands flourish in even the smallest outdoor space.
Start small and build your confidence with a few easy plants before expanding your balcony garden. Your future self will thank you for taking that first step, and your neighbors might even ask for gardening tips once they see what you’ve accomplished. Grab a few pots, some good soil, and seeds for your favorite plants—your balcony garden adventure is waiting to begin.